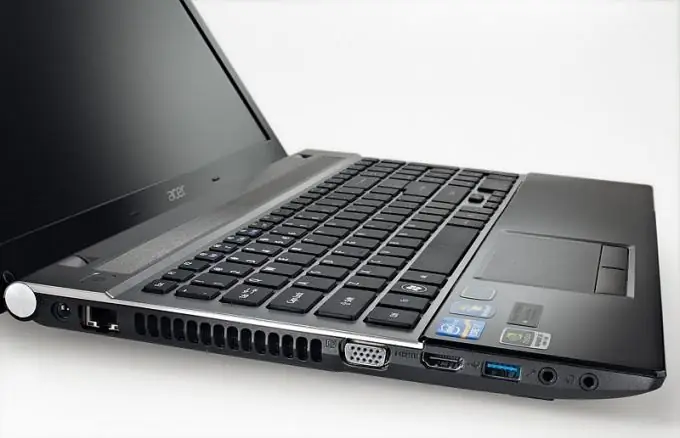
The laptop model Acer Aspire V3-571G is designed in such a way that in order, for example, to clean the cooler, you need to completely disassemble the laptop. Of course, this is not the most convenient design. But if there is no way out, let's see how to do it.
Necessary
- - Notebook Acer Aspire V3-571G;
- - Phillips screwdriver.
Instructions
Step 1
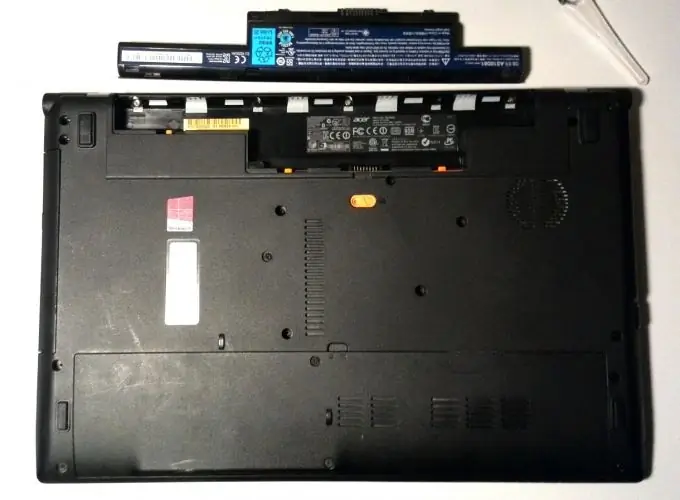
Flip the Acer Aspire V3-571G laptop "on its back". Let's take out the battery by pressing the orange button recessed into the case.
Step 2
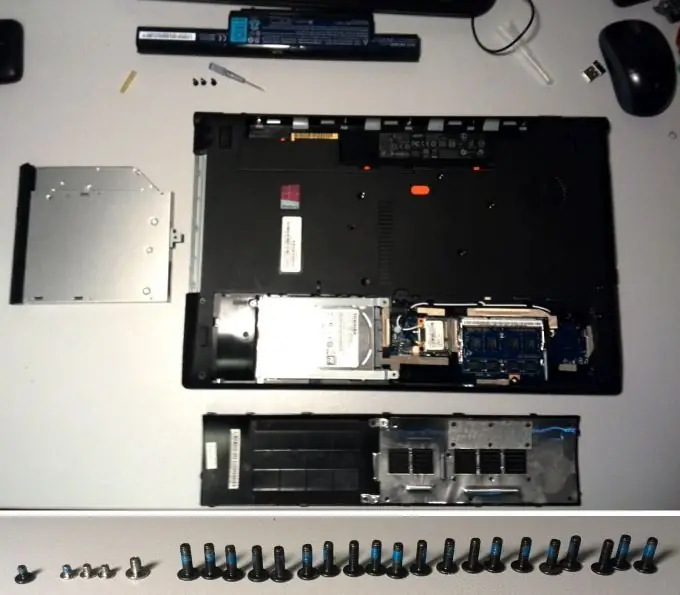
Unscrew all the screws on the bottom of the laptop. When all the screws are removed, take out the DVD drive and open the cover of the hard drive and memory compartment. The screws are still visible under the cover, we unscrew all of them. Also remove the 3 small screws in the battery compartment. In total, 20 black long 8 mm screws and 5 short ones should be unscrewed.
Disconnect the white and black wires from the WiFi module. Now we take out the hard drive and WiFi module.
Step 3
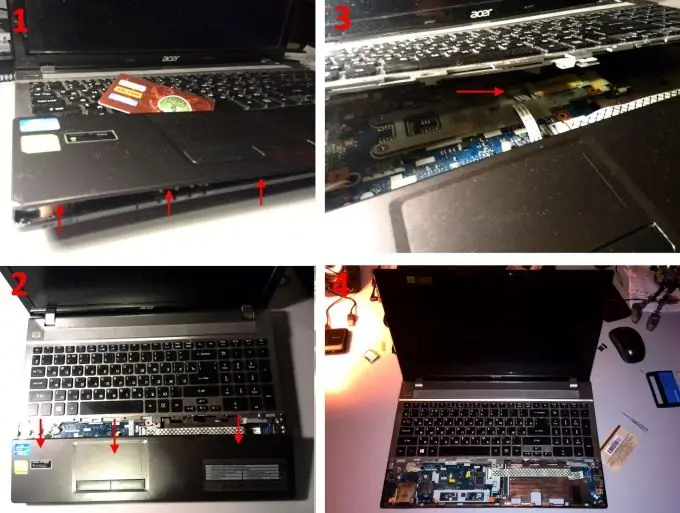
Now let's pry off the plastic cover on the top panel, on which the laptop's touchpad is located, and go around its entire perimeter to unfasten all the plastic latches. When the latches are unfastened, the cover can be moved. It connects to the laptop motherboard with a thin ribbon cable.
Disconnect the ribbon cable connector in the standard way: pull the latch holding the ribbon cable in the connector away from the connector. After that, the touchpad panel can be removed.
Step 4
Now you need to remove the keyboard of the Acer Aspire V3-571G laptop. To do this, unscrew 1 screw located under the touchpad panel. Unfasten the latches around the keyboard panel. Then flip the laptop over and unfasten all the latches that secure the silver keyboard panel to the laptop.
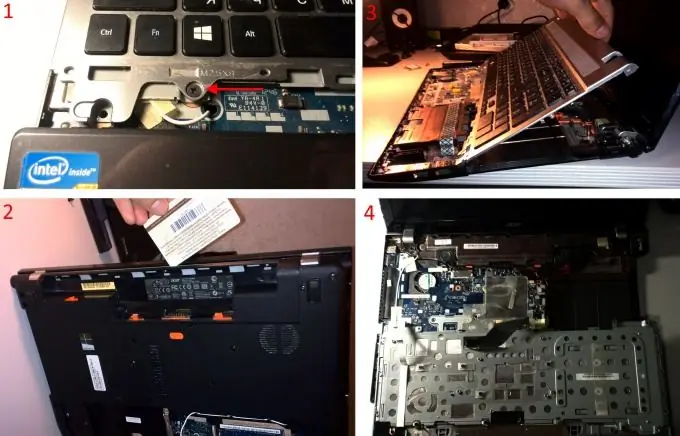
Step 5
We raise the panel with the keyboard. It connects to the motherboard with two ribbon cables. We disconnect them - and after that the keyboard can be removed. A view of the motherboard opens.
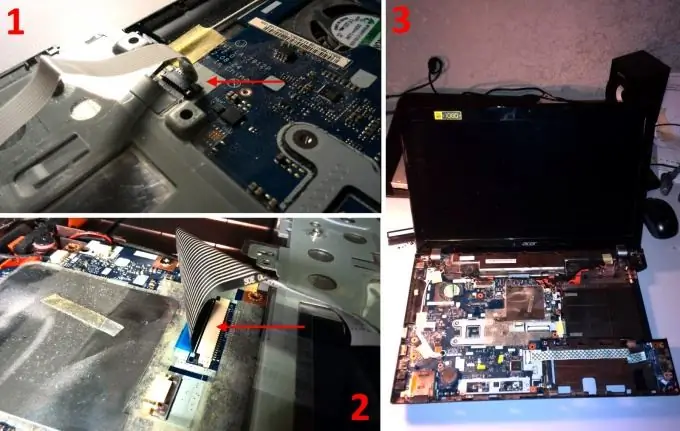
Step 6
To remove the USB ports on the right side of the Acer Aspire V3-571G laptop, you need to unscrew the screw that secures them and disconnect the ribbon cable from the motherboard.
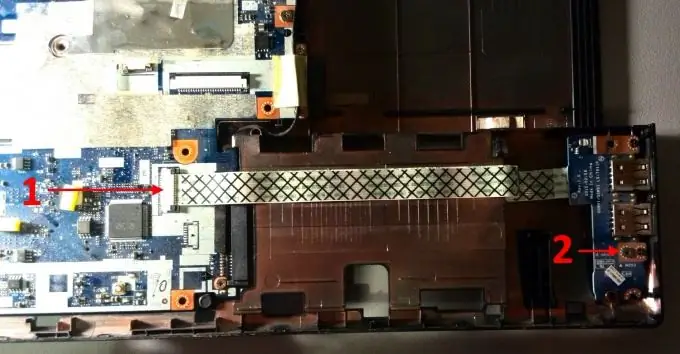
Step 7
Loosen all the screws that secure the motherboard. Then we disconnect all the cables, there are 4 of them on the top side and 1 on the bottom. We will also pull out the black and white wires that go to the WiFi network module. The motherboard is now easily removable.
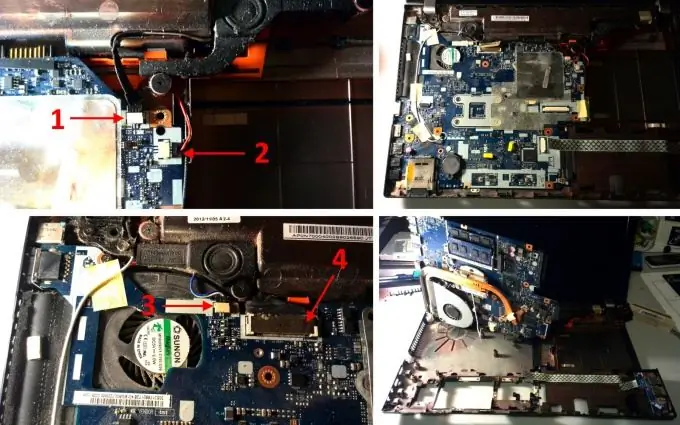
Step 8
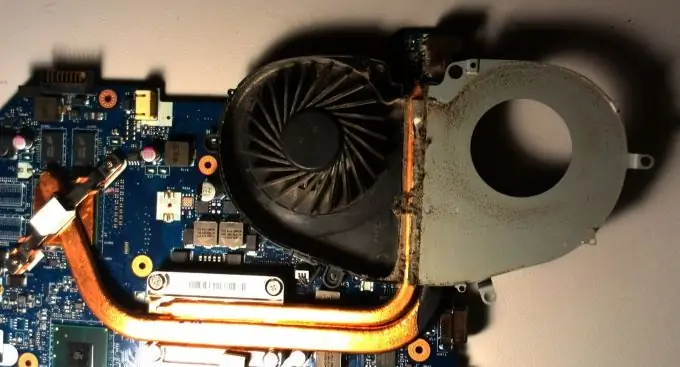
When the motherboard is removed, we get access to the cooler of the Acer Aspire V3-571G laptop. Its cover can be removed. It is secured with 4 small and 2 large screws.
Step 9
Well, here we have disassembled the Acer Aspire V3-571G laptop completely. The numbers in the photo indicate the parts that we shot:
1 - laptop case with a screen;
2 - motherboard;
3 - cover for hard drive and memory compartment;
4 - touchpad panel;
5 - keyboard panel;
6 - storage battery;
7 - DVD drive;
8 - hard HDD disk;
9 - WiFi network card.


