Imaging software is used to completely duplicate the contents of the CD. Undoubtedly, one of the leaders in this segment of software products is Alcohol 120%.

Instructions
Step 1
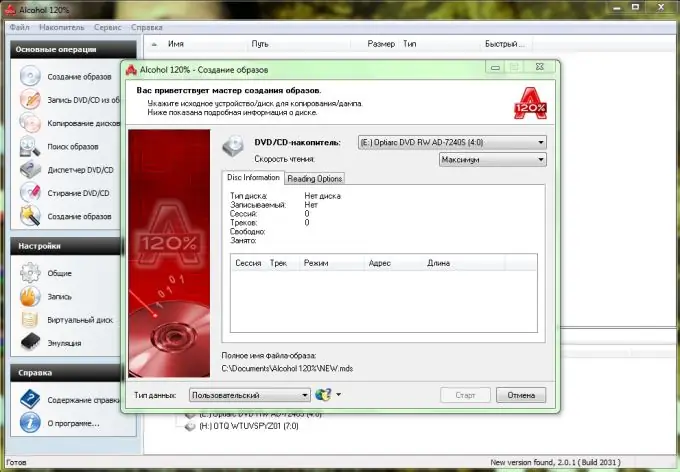
Insert the disc you want to image into the disk drive of your computer. Run the Alcohol 120% program. In the toolbar, click on the icon with the image of a disk in the folder, or select the "New" item in the "File" menu. After that, a window will open in which you must specify the parameters of the created image.
Step 2
In the "CD / DVD drive" item, specify the drive that contains the disc from which you want to capture the image. To do this, click on the drop-down menu and select the required device. If the computer has one drive, it will be selected by default.
Step 3
In the "Reading speed" item, specify the required speed. By default, the maximum speed is set, but you can specify the one that you think is necessary.
Step 4
Check the box “Skip reading errors”. The disc you want to image from may be scratched or other minor damage. Enabling skipping read errors will allow you to continue imaging in the event of an error.
Step 5
The next option "Skip bad blocks quickly" is supported by some special CD formats to speed up image creation. Check the box next to this item if you want to enable this option.
Step 6
Enabling "Advanced Sector Scanning (A. S. S.)" will allow you to skip entire error blocks. This increases the speed of reading information from the disk. If you wish, you can check the box next to this item.
Step 7
Checking the box next to the “Read subchannel data from the current disc” item will allow reading data from the disc subchannel. Required for some special disc formats. Not used when working with regular discs.
Step 8
Next, you need to select the data type. Click on the drop-down menu opposite the corresponding item and specify the type of disk that is being imaged. Then click Next.
Step 9
In the next window, specify the location of the future image, its name and format. The default is mds, but others can be used, such as ccd, cue, or iso. Then press the "Start" button. After completing the imaging process, click the Finish button.


