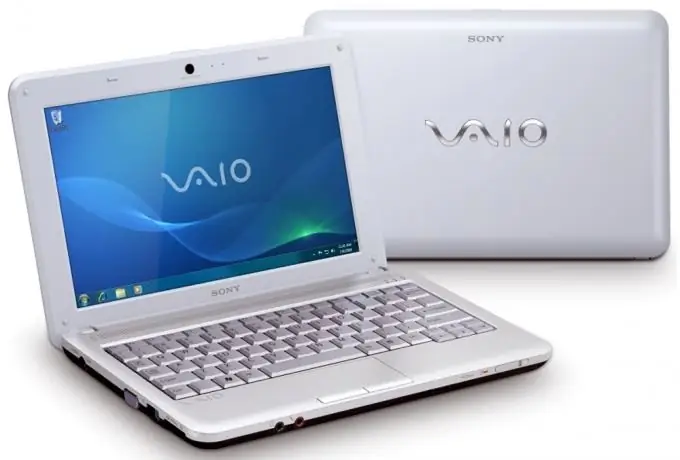
We disassemble the Sony Vaio netbook, model PCG-21311V (VPCM12M1R), to replace the RAM module and hard drive.

Necessary
- - Sony Vaio netbook model PCG-21311V (VPCM12M1R);
- - set of screwdrivers.
Instructions
Step 1
Turn the Sony Vaio PCG-21311V (VPCM12M1R) netbook upside down. Disconnect the battery.
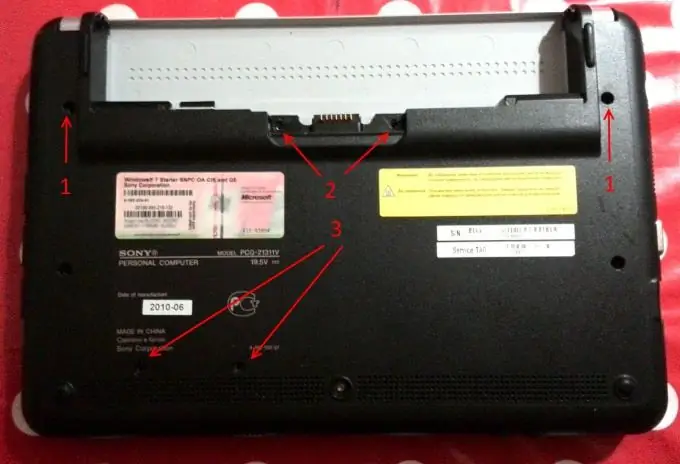
Now we unscrew the 6 screws indicated in the photo. Screws numbered 1 and 2 hold the keyboard, and screws numbered 3 secure the hard drive. One of the screws that secures the keyboard also secures the hard drive carrier.
Note that the screws at position 2 are initially sealed with black duct tape. The ribbon is almost the same color as the body and is practically invisible. To unscrew these screws, you will have to remove the tape.

Step 2
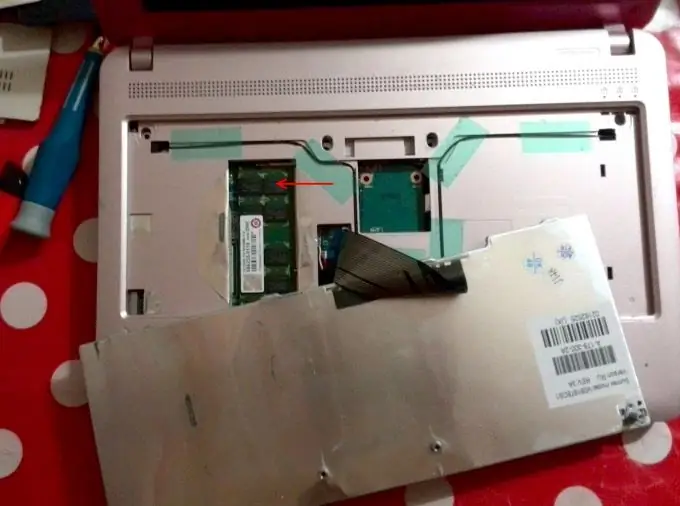
The slot with the RAM module is located on the top of the Sony Vaio VPCM12M1R netbook, under the keyboard. This netbook contains only one slot.
We turn the netbook over with the keyboard up. We have already unscrewed the fastening screws of the keyboard, it remains to carefully pry the keyboard around the perimeter and pull out the plastic latches from the slots, pull it out a little from the recess on the top panel. Lift the keyboard without disconnecting the ribbon cable from the connector. After that, the RAM slot becomes available, and you can replace the memory module with a more capacious or faster one.

Step 3
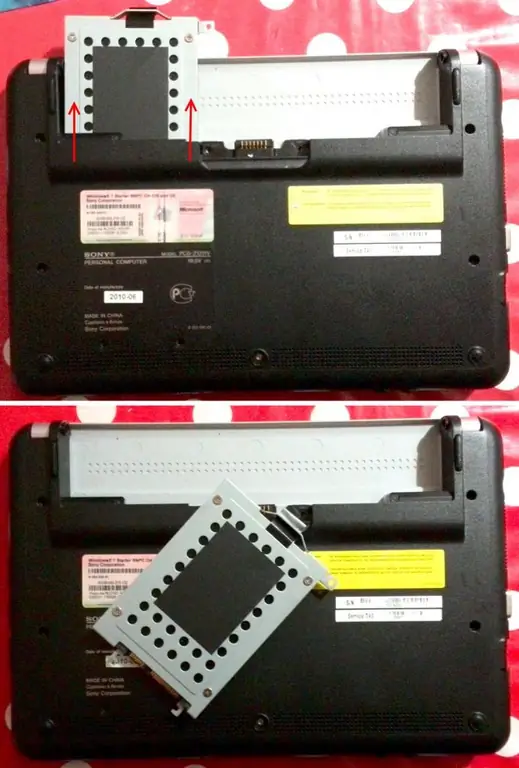
To remove the hard drive of the Sony Vaio PCG-21311V netbook, turn the computer upside down. A metal loop of the hard drive sled protrudes in the battery compartment. Pull it away from the center, and the HDD comes out.

Step 4
If you need to disassemble the netbook completely, remove the remaining screws from the bottom of the case. Disconnect the keyboard cable and remove it. Disconnect the 2 black wires located under the keyboard to the wireless network card. Then, carefully walk around the perimeter and detach any plastic clips connecting the top and bottom covers. And only then detach the top cover of the netbook from the bottom to get close to the motherboard.


