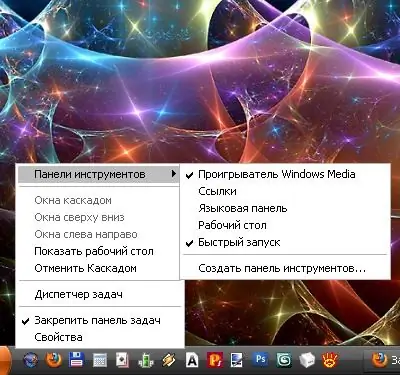
By default, the taskbar in Windows is located at the bottom of the screen, but this does not mean that the user cannot customize the position and appearance of the panel to his liking or set options in order to hide it completely. To change the location of the taskbar, you need to take several steps.

Instructions
Step 1
Move the mouse cursor to the bottom edge of the screen and click on the taskbar in any free space with the right mouse button. In the drop-down menu with the left mouse button, click on the item "Dock the taskbar" to remove the set marker. Place the cursor in any free space of the taskbar, press the left mouse button. Keeping it pressed, slide the panel to the left, right, or top edge of the screen. Click again on the panel with the right mouse button and in the drop-down menu put a marker opposite the item "Dock the taskbar".
Step 2
To "hide" the taskbar, right-click on it and select Properties from the drop-down menu, or click on the panel with the left mouse button and press the alt="Image" and Enter key combination. If you cannot open the taskbar properties window from the desktop, select “Control Panel” from the “Start” menu and click on the “Taskbar and Start Menu” icon in the “Appearance and Themes” category. In the properties window that opens, go to the "Taskbar" tab and set the marker in the "Automatically hide the taskbar" field. Click the Apply button and close the window.
Step 3
To add an application quick launch panel, right-click on the taskbar and select the “Quick launch” line in the “Toolbars” submenu. Place a marker opposite this item. Place the mouse cursor over the icon of the application you want to add to the Quick Launch bar. Hold down the left mouse button and drag the icon to the panel. After that, you can delete the icon from the desktop. If there is not enough space on the Quick Launch to display all the icons you want, remove the check mark from the Dock Task Bar and use the mouse to adjust the size of the Quick Launch. After - pin the taskbar again.


