One day you turn on your PC, but it does not start. How to be? Is that all? But there is so much valuable information … But do not get upset ahead of time, because you can restore the OS installed on your PC and create a boot menu.

Necessary
a personal computer with access to the global network
Instructions
Step 1
Insert the bootable DVD into the drive: it must contain the Windows VISTA operating system (this is the operating system installed on the computer). Then restart your PC.
Step 2
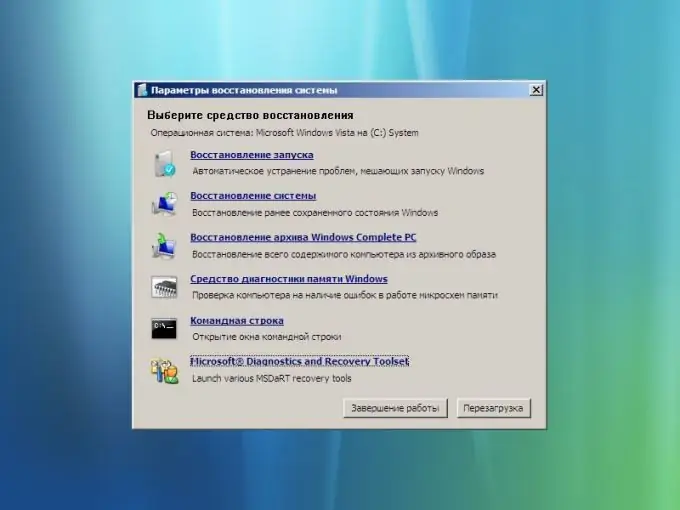
After a message appears on the screen stating that the DVD has started loading, press Enter. In the first window "Install Windows" that appears, click "Next"; in the second - "System Restore"; in the third, select Windows Vista from the list and click "Next". In the fourth window, perform the following operation: select "Startup Repair" in automatic mode, or enter e: oot ootsect.exe / NT60 All in the "Command line".
Step 3
Download EasyBCD 1.7 on the Internet. When uploading, specify the path - logical drive D.
Step 4
Install the EasyBCD 1.7 program on your computer: to do this, click on the EasyBCD 1.7 file with the * exe extension. A warning window will appear on the screen, in which click on the "Allow" tab. After complete installation, EasyBCD 1.7 will automatically start on your computer. If suddenly this does not happen, click on the shortcut on the desktop.
Step 5
In the program that opens, go to the Add tab and select Remove Entries. Then enter Windows NT / 2k / XP / 2k3 in the Type field and any name in the Name field. After that, click on Add Entry with a computer mouse and save all changes by clicking Save.


