The Network Neighborhood shortcut is present on the Windows desktop with default settings. It is posted here for quick access to local network shares. If your computer does not have such connections, then this icon can be removed.

Instructions
Step 1
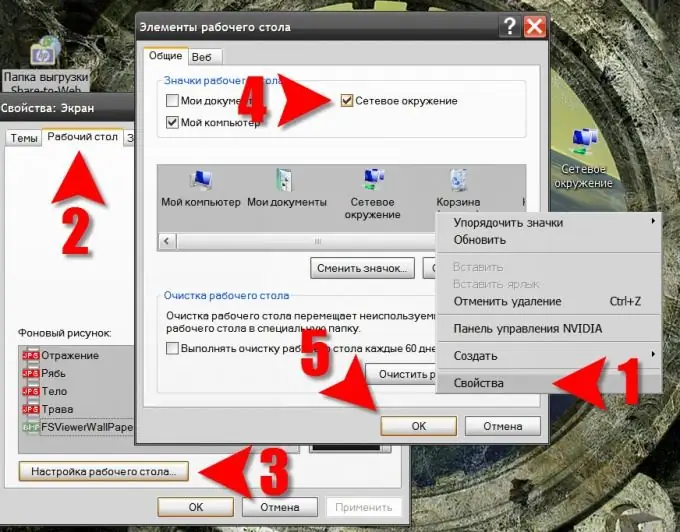
On a desktop space free from shortcuts and windows of open programs, right-click. In the drop-down context menu, select the lowest item - "Properties". This will open the Windows GUI display properties settings window.
Step 2
By default, the window will open on the first tab ("Themes"), and you need to go to the second ("Desktop") - click it.
Step 3
This tab contains the settings related to the wallpaper and screen saver, and at the very bottom there is the button you need with the inscription "Desktop customization". Click it to open another window designed to control the elements placed in the space above the background image.
Step 4
On the General tab of this window, the top section is named Desktop Icons and contains several checkboxes. By placing or unmarking them, you can turn on or off the display of the corresponding labels. Uncheck the box next to Network Neighborhood. In addition, here you can turn off other desktop icons that you do not need, or change their appearance. Or you can generally clear the background image from all shortcuts by clicking the "Clear Desktop" button. In this case, even those icons that are not in the list on this tab (for example, "Trash") will be deleted.
Step 5
It remains to close the two open settings windows by sequentially clicking the "OK" buttons in them.


