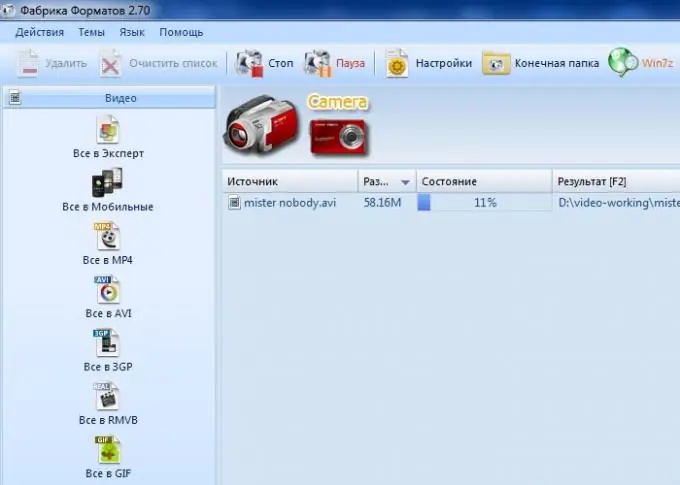
You may need to change the type of the video file in different cases, for example, if the video editor does not want to open a video. This can be done using a real virtual harvester - the Format Factory program.

Necessary
Russified version of Format Factory 2.70
Instructions
Step 1
Run the program and add the required files to it. This can be done in at least two ways.
Step 2
First - click the "Video" button and in the menu that appears from the list of formats, select the one to which you want to change the format of your video. All options may not be visible, so expand the program window wider or use the arrows on the right side of the menu. In the menu that appears, click on "File", select the video, click "Open" and then "OK".
Step 3
Second, just drag the video file from the explorer window to the working area of the program. In the window that appears, select the required format and click "OK".
Step 4
After the file is added to the program, you can proceed to the conversion settings. Double click on the line of the file in the workspace. In the window that appears, you can change both video (file resolution, codec, number of frames, aspect ratio) and audio settings (codec, frequency, bit rate, channel, volume, as well as the presence or absence of sound). Pay attention to the panel that gives access to the drop-down menu. It already has enough templates for the future file, and you may be interested in some of them. Having dealt with the settings, click "OK".
Step 5
To save the result, click the "Actions"> "Settings" menu item and specify the required directory in the "Destination folder" field. Click "Apply" and "OK" for the changes to take effect.
Step 6
Click the "Start" button to start converting. In the "Status" column, you can watch the conversion progress. If it takes a long time, you can check the box next to "After conversion, turn off the PC", which is located in the lower right part of the program.
Step 7
After the conversion is complete, the "Completed" message will appear in the "Status" column. Go to the appropriate directory and see for yourself. This can be done by right-clicking on the file line and choosing "Open destination folder" from the drop-down menu.


