As a rule, changing the file type means changing the extension in its name - the part that is added through a period to the right to the file name. By extension, the operating system determines which of the installed applications should work with files of this type, launches it and transfers the file for processing. Usually, the extension is added to the name of the program in which the file was created when it is saved. If necessary, you can change it using Windows Vista Explorer.

Instructions
Step 1
Open the standard file manager for all versions of Windows OS - Explorer. To do this, click a couple of times on the "My Computer" icon on the desktop of your system, or use the hotkeys win + e (this is a Latin letter).
Step 2
Navigate through the directory tree to the folder where the file you are not satisfied with is stored. If you can see the extension of this file in the Explorer window, then right-click it and use the "Rename" command from the context menu that opens. Press the end key to move the insertion point to the end of the name and replace the existing extension with the one that matches the file type you want. Then press enter to finish editing the file name. When asked to confirm the change of the extension, click "Yes".
Step 3
If Explorer hides file extensions from you, then you have a choice - change the setting that forces it to do so, or change the extension in a slightly less convenient way. If you do not intend to constantly change file types, then it is easier to choose the second option. In this case, right-click on the file and use the lowest item in the context menu (Properties) to open the File Properties window. The topmost field on the General tab of this window will contain the full name of the file, including its extension - edit it as needed and click OK.
Step 4
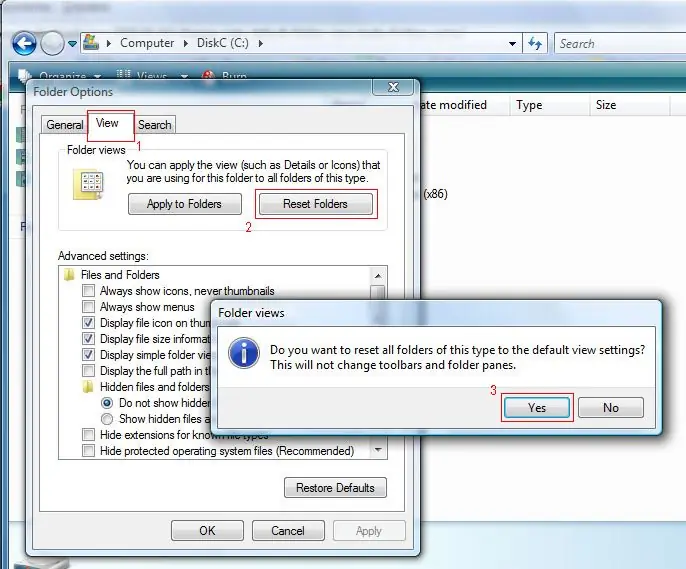
If you decide to cancel the prohibition for Explorer to display file extensions, then press the alt key, and in the Explorer menu that opens, select the "Folder options" line. On the "View" tab, find the line "Hide extensions for registered file types" and uncheck the checkbox. Then click the OK button. After that, it will be possible to change the file extension in the way described in the second step.


