Programs from the German company Nero have long been the most common tool for recording data on optical media. Currently, the ninth version of the Nero Burning ROM software package is most commonly used. With its help, you can create both music and video CDs and DVDs, as well as discs with data of various kinds.

Instructions
Step 1
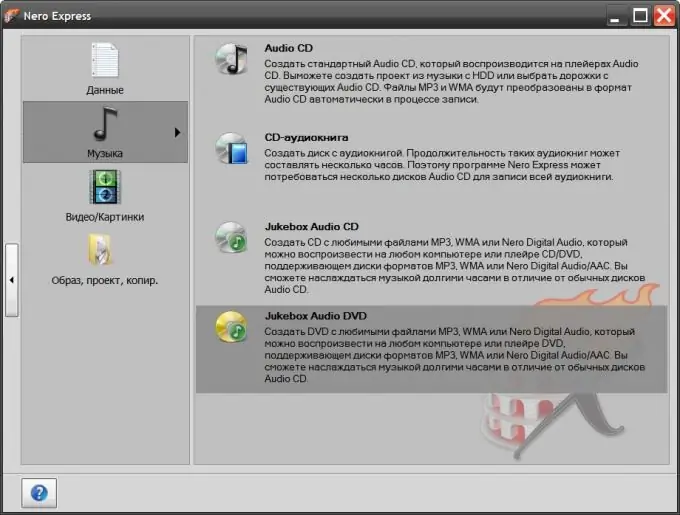
Use a simplified version of the Quick DVD Burner interface - this version is called Nero Express. Insert the disc into the DVD reader / writer and launch the program. On the left side of the window that opens, you need to select the type of files that will be placed on the disk - data, music, pictures / video. The fourth item on this list (Image, Project, Copy) allows you to create copies of discs (including DVDs) or recreate them from files containing a disc image.
Step 2
Depending on which of the items you select in the left list, a different set of options will appear on the right side. The largest selection will be when you select Music - four options, but three of them relate to creating CDs. When you select Data, there will be only two options - click Data DVD.
Step 3
In the next window, make sure that Nero has correctly determined the capacity of the disc you have installed - above the "Back" button there is a drop-down list in which you can change the value selected by the program. Then click the "Add" button.
Step 4
Find the files or folders you want to burn to disk using the dialog box that appears. Here you can select not only single objects, but also groups of files or folders. After you click the Add button in this window, the selected files will be added to the general list in the main window and the disk full indicator will change. The dialog box will not close, and you can continue to add new files to the general list. When the total size reaches the maximum allowed for the installed drive, the indicator color will change from green, first to yellow (you need to stop here), and then to red. Click the "Close" button in the dialog box, and then, if necessary, delete unnecessary files from the general list by selecting them and clicking the "Delete" button. When the composition of the future DVD is determined, click the "Next" button.
Step 5
Type a name for the new disc in the "Disc name" field. Make sure the "Allow adding files" box is checked if you want to be able to add or remove files from this DVD in the future. Then click the "Burn" button and the program will start the process of "burning" the DVD disc.


