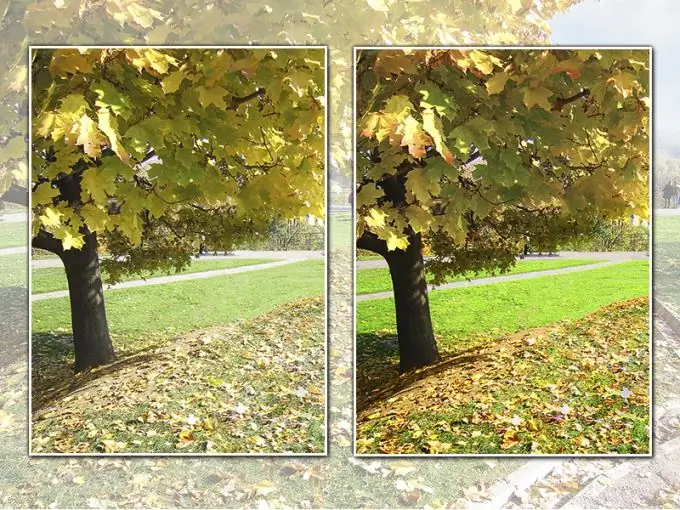
It happens that, having studied the many functions and capabilities of the Adobe Photoshop program, having done more than a dozen exercises, the user opens a real picture and does not know where to start processing. He does not understand what kind of tools he will need in this case and in what order they should be used. Meanwhile, there is a certain sequence of actions that can turn a gray and boring photo into a bright and memorable photo.

Necessary
- - Adobe Photoshop;
- - photo for processing.
Instructions
Step 1
Although all photo processing operations can be performed in Photoshop itself, it is better to start corrections in the camera RAW module. Moreover, in it you can open files not only with the RAW extension, but also JPEG, TIFF, PNG, PSD. To do this, start Photoshop and execute the "File" - "Open As" command. Point the program to the desired file, select the Camera RAW extension and click the "Open" button.
Step 2
Start working on the image by adjusting the White Balance (WB). This can be done using a special tool located on the top panel. Zoom in and click on the neutral white or gray point with the eyedropper. Make sure that the area with the sample is not overexposed. Never expose the BB for glare - the result will be unpredictable.
Step 3
You can also use the drop-down menu "White Balance" and select one of the ready-made presets. The full list is only available for RAW images. For all other photos, the choice is small - "As shot" (the WB set during shooting will be used) and "Auto" (the application will automatically select the optimal WB).
Step 4
For fine-tuning the WB, the "Temperature" regulators (allows you to change the image temperature in Kelvin) and "Tint" (removes parasitic colors in the photo) are intended. You can increase the color temperature slightly to make the colors warmer, or, alternatively, lower it and give the image a cool atmosphere.
Step 5
Using the Exposure slider, you can lighten or darken the image. Make sure that there are no overexposures or dips in the shadows. For texture and detail, try increasing the contrast slightly by moving the appropriate slider to the right.
Step 6
The Highlight and Shadow sliders help add depth to the image. Pay attention to the histogram. You can remove overexposures and restore shadow details using the White and Shading controls.
Step 7
Set the view scale to 100% and adjust the Clarity slider to improve the contrast of the midtones. If the image needs a strong increase in contrast, adjust the shape of the curve in the Tonal Curve tab.
Step 8
Use the Detail tab to improve sharpness. Use the knobs to adjust the Effect and Detail values. If you are processing a portrait photo, then it is necessary to increase the value of the "Masking" parameter.
Step 9
The initial processing is complete, to switch to Photoshop, click the "Open Image" button. If you hold down the Alt key, then it will open as a smart object. In the latest version of the program - Photoshop CC, you can open in camera RAW not only the whole image, but also a separate layer. To do this, use the command "Filter" - "Filter camera RAW".
Step 10
The main image problems were fixed in the previous step. Now, if you want to selectively increase the contrast of the image, create a Curves adjustment layer. Select the appropriate shape of the curve and on the mask of the adjustment layer paint with a black brush the fragments, the contrast of which does not need to be increased.
Step 11
If important details are lost in the dark areas of the image, create a copy of the main layer (keyboard shortcut Ctrl + J) and go to the Lab color model (command "Image" - "Mode" - Lab).
Step 12
Open the Channels panel and activate the Brightness channel. Run the command "Image" - "Adjustments" - "Shadows / Highlights". In the window that opens, check the "Show advanced options" item.
Step 13
In the Shadows section, reduce the Effect parameter to 25-30% and increase the Hue to 55-60%. To make the effect look natural, set the Radius value to a range of 250-300 pixels.
Step 14
Go back to RGB color model. Create a layer mask, fill it with black, and paint in dark areas of the image with a soft white brush. If the effect is too strong, lower the layer's opacity to 75-80%.
Step 15
To improve the colors of the image, go back to the Lab color model and use the command "Image" - "External channel". In the window that opens, select the "Soft Light" mode from the "Overlay" drop-down menu. Open the Channels list and see how the image will look for Lab, a or b channels.
Step 16
Choose the image that best suits your needs. If the effect is too harsh, then while in the same dialog box, lower the Opacity parameter. Go back to RGB color space.
Step 17
If you need to make certain parts of the image darker (for example, darken the sky), create a copy of the layer and change the blending mode to Multiply. Create a layer mask and fill it with black and white gradient, hiding unnecessary areas. In the same way, but using the "Screen" blend mode, you can lighten part of the image.
Step 18
To moderately sharpen a medium-sized image, use the Unsharp Mask filter with Effect 85%, Radius 1%, Isogelia 4%. Immediately after that, apply the command "Ease: Unsharp" and change the layer's blend mode to "Glow" to avoid problems with colors.


