Sometimes, when processing images with Adobe Photoshop, you need to select a complex object. This graphics editor offers several ways to accomplish these tasks. The choice of tool depends on the type of image.

Instructions
Step 1
If you want to select a fragment with clear outlines, you can use the tools from the Lasso group. Press the L key to activate them. If you choose the Lasso Tool, you have to select the object entirely by hand. Move the cursor over the border of the fragment, hold down the left mouse button and drag the selection line. When you close the loop, release the button. This method is very inconvenient, since it is easy to make a mistake and draw a line in the wrong direction. To deselect, press Ctrl + D.
Step 2
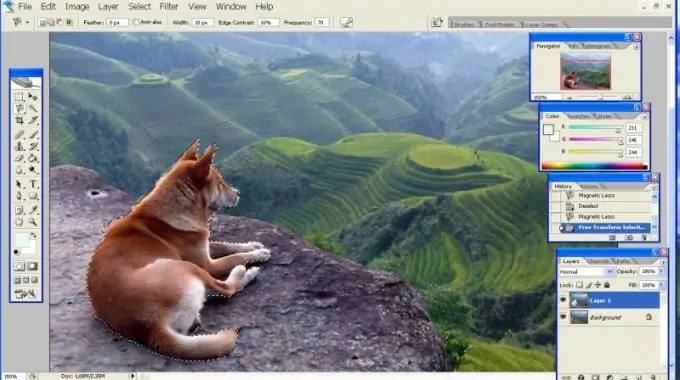
Much more convenient is the Magnetic Lasso Tool - "Magnetic Lasso". It distinguishes between the color of the object and the background color and determines the selection line itself. In the settings panel, set the parameters of the tool. In the Feather window, if necessary, specify the amount of blur (feathering) of the selection edges in pixels.

Step 3
In the Width box, set the width of the strip that the tool will analyze to determine the boundaries of the object. Set the difference in color between the background and the selection in the Edge Contrast window. The more the background and the object merge, the lower this value should be.
Step 4
In the Frecuency window, specify the frequency with which the tool will sample the color from the image to determine the boundary of the object. The more complex the line of selection (for example, fluffy animal hair or lush crown of a tree), the higher the frequency should be.
Step 5
Click on the border of the fragment and move the cursor further - the selection line will stick to the object, as it were. In places where the background color is close to the color of the object, click more often. If the selection line has gone in the wrong direction, press Backspace to undo the erroneous actions. The selection is complete when the line is closed.
Step 6
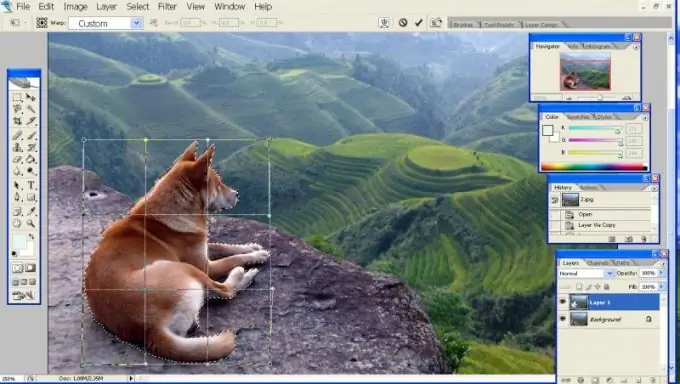
To correct the errors, on the Select menu, choose the Transform Selection command. Right click inside the box that appears and check the Warp option. Grab a mesh node with the mouse and drag in the required direction to change the shape of the selection line in a certain area.

Step 7
If the object is sharply different in color from the background, it is convenient to use the Magic Wand Tool. Press the W key to activate it. On the settings panel, in the Tolerance field, specify the amount of deviation from the background color, by which the tool will determine the border of the object.
Step 8
The checkbox in the Contiguous field determines whether only adjacent areas or matching objects in the entire image will be selected. To combine selected areas or, conversely, to exclude an area from the selection, use the group of buttons in the form of squares to the right of the image of the magic wand. The modifier keys play the same role:
• Shift - add to selection;
• Alt - exclusion from selection;
• Alt-Shift - intersection of selections.


