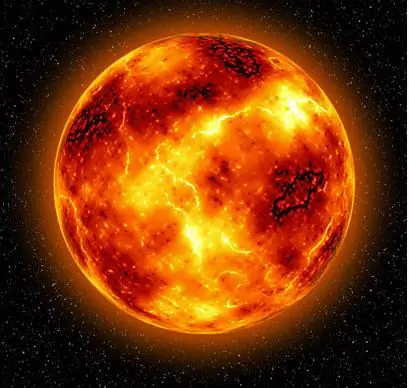
Modern computer graphics technologies allow us to embody the most incredible fantasies in the form of three-dimensional or realistic paintings. Space objects, fantastic patterns - all this is possible with the help of the graphics program Photoshop, and the fireball is no exception, which can be created in a couple of mouse clicks.

Necessary
Photoshop
Instructions
Step 1
Create a new 800x800 pixel drawing in Photoshop. It is better to choose a larger scale than you planned, then the result will look better. Later, you can always reduce it to the size you need.
Step 2
Scale the image down to a suitable work area. Create a new layer and select the "selection" tool. Press Shift and create a circle. The larger its diameter, the better. Do not remove the selection yet, but fill it with black color using the "fill" tool.
Step 3
In the "Filters" menu, select "Render", then "Overlay Clouds" (Filter> Render> Difference Clouds). Press CTRL + F to reapply the filter until you are satisfied with the result. Also increase the contrast of the clouds. To do this, select "image" from the menu, then "Correction" and "brightness / contrast" (Image> Adjustments> Brightness / Contrast). Then you need to work on the level in the "image" menu, then "correction" and "levels" (Image> Adjustments> Levels). Move the center and right sliders to the left and right so that the result is roughly similar to the one in the picture.
Step 4
Apply the Unsharp Mask Filter. To do this, in the "filter" menu, select "sharpness" and there "contour sharpness" (Filter> Sharpen> Unsharp Mask). In the window that opens, set the following parameters:
Amount: 500%
Radius: 3.0
Threshold: 15
Step 5
Then apply the "Spherize" Filter in the "Filters" menu, then "Distort" and "Spherize" (Filter> Distort> Spherize). In the window that opens, set the parameter:
Amount: 100%
Step 6
Then save the window and open the same "spherization" filter again. Remember, you don't need to repeat the filter with CTRL + F, but apply it again through the menu. In the window that opens, apply another parameter:
Amount: 50%
Step 7
After working with filters, you need to adjust the color balance to the desired color. To do this, in the "image" menu, select "correction" and "color balance" (Image> Adjustments> Color Balance). Set the following parameters:
Shadows: +100 | 0 | -100
Midtones: +100 | 0 | -100
Highlights: +70 | 0 | -fifteen
Step 8
The final step is to apply a filter in the "Filter" menu, then "Sharpen" and "Unsharp" (Filter> Sharpen> Unsharp Mask). Set the following parameters:
Amount: 300%
Radius: 3
Threshold: 15 If you are satisfied with the result, you can deselect by pressing CTRL + D. You should have a real fireball, like in the picture.


