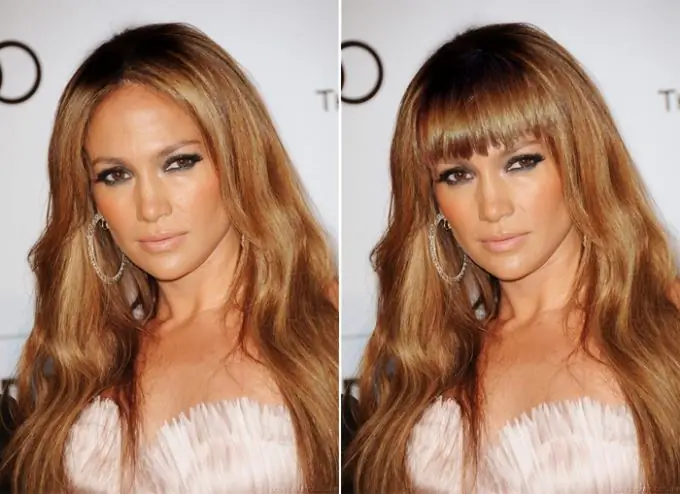
If you want to know how you will look with bangs without visiting the hairdresser or to get your own photo with a different hairstyle, you can do yourself a bang in Photoshop.

Necessary
- - your photo, which clearly shows your face
- - a photo of a person with bangs that you would like to try on
- - "Photoshop" program
- - know what layers are
- - know how to resize images in Photoshop
- - know how to copy and paste a section of an image
- - be able to use the tools "Eraser", "Straight Lasso", "Blur", "Dimmer", "Dodge"
Instructions
Step 1
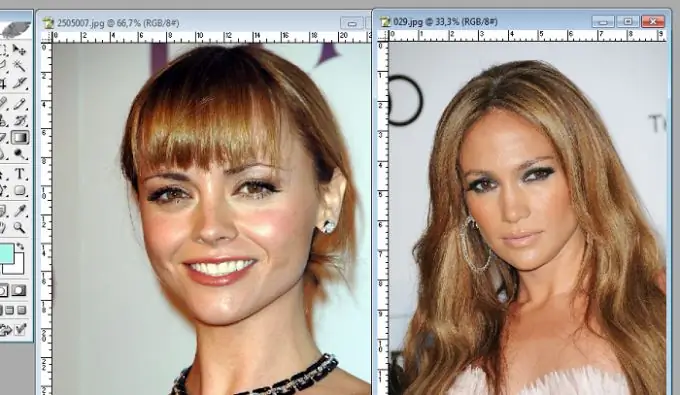
To add bangs to your photo, first find a photo of the person with the desired bangs that match the color of your hair. Save this photo. Open both photos in Photoshop. Resize the photos so that at 100% your face is the same size as the other person's.

Step 2
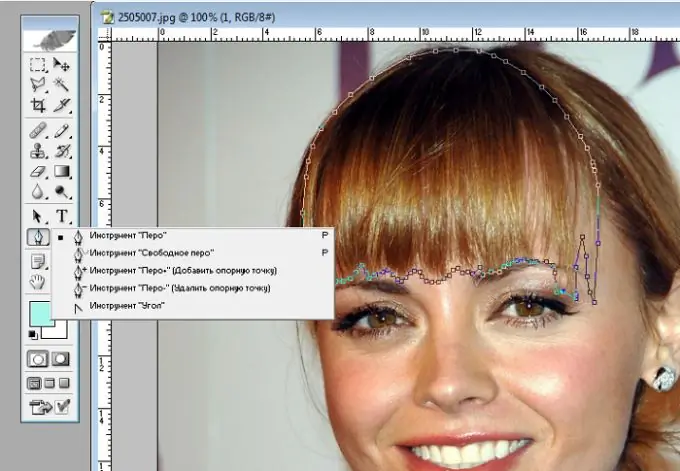
Zoom in on the person with the bangs using the Loupe tool so that the bangs are clearly visible. Then select the Pen tool and select the bangs. Edit the selection using the Plus Pen Tool. After editing the contour, without removing the cursor from it, press the right mouse button and select "Form selection area". Set the feathering radius in the window that appears to 0 pixels.

Step 3
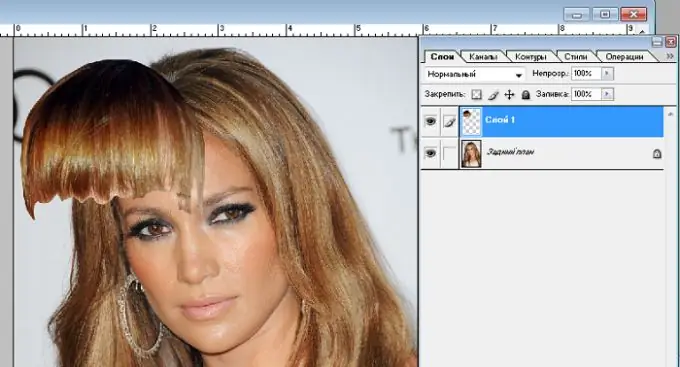
Copy the highlighted bangs and paste into your photo document. The bangs will automatically be inserted on a new layer, which will be higher than the photo layer.

Step 4
Using the "Edit - Free Transform" command, place the bangs on the desired part of the face, rotate it as needed, select the desired size. Using the Eraser tool and the "Selection - Color Range" command, excluding unnecessary selections, using the Straight Lasso Tool + Alt., Carefully remove unnecessary parts of the bangs, and with the "Blur" tool, gently blur its edges, before increasing it to the maximum size. Use the Burn and Dodge tools to darken or lighten the desired areas of the hair so that the line between the hair and bangs is not visible. Use the Image-Correction-Color Balance, Image-Correction-Hue / Saturation, and Image-Correction-Brightness / Contrast commands to adjust the color scheme of the bangs so that they do not differ from the hair color.


