Working in a room where there are two or more computers, it is periodically necessary to exchange data between them. It is not very convenient to exchange files using external media or wireless communication, and it takes a lot of time. The most suitable way is a local area network. Once you have it, sharing your files will be a breeze. You need to create a shared folder.

Necessary
PC
Instructions
Step 1
First of all, you get to the "Local security settings" section. Then open the Local Policies folder, and then the User Rights Assignment subfolder. Now on the right you find the line "Denied access to the computer from the network", click on it and, selecting "Guest", click "Delete".
Step 2
Then open the line "Access to the computer from the network" and click "Add user or group", then go to "advanced", then to "search". Then find "Guest", confirm everything.
Step 3
Next, go to the "security settings" folder, then go to "Accounts: Guest account status" and open it. Next, turn on everything.
Step 4
Next, you need to set a password for the "guest" account. Follow this path (My Computer Management Local Users and Groups Users). Choose "guest" and set a password.
Step 5
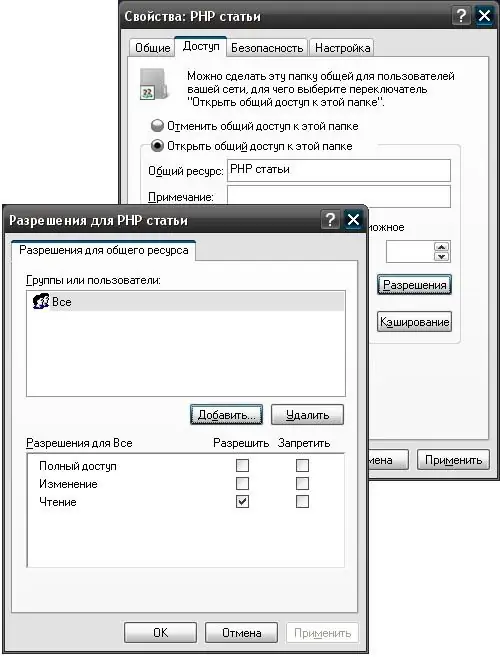
Now set access to the folder. To do this, in the properties of this folder, check the box next to "Share this folder" and after entering the "search" (Add Advanced Search Permissions) we find "Guest", click on it, confirm and that's it.
Step 6
Sharing is almost set up, now it remains only at the bottom to determine what can be done inside the shared folder - read or change. As you can see, the process of exchanging files between computers using a local network is not difficult, you just need to follow this algorithm.


