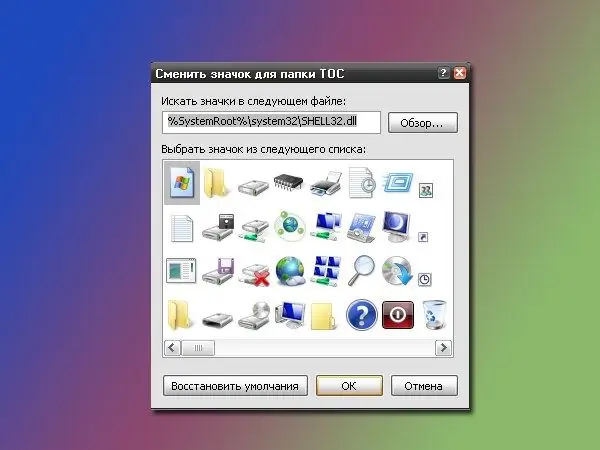
In the Windows operating system, the user can change the appearance of the icons on the "Desktop" at any time. You can change not only the icons for user folders, but also for the main elements of the "Desktop", as well as for different types of files.

Instructions
Step 1
To set your icon to a custom folder, move the cursor to its icon and right-click. In the drop-down menu select "Properties" - a new dialog box will open. Go to the Settings tab and click the Change Icon button in the Folder Icons category.
Step 2
In the window that opens, select a new icon from the library, or specify the path to your own icon by clicking on the "Browse" button. Remember that the icon file must have the.ico extension. Click on the OK button. In the properties window, click on the "Apply" button for the new settings to take effect. Click the OK button or the [x] icon to close the window.
Step 3
You can change the appearance of the icon of the "Desktop" item ("Trash", "My Computer", "My Documents") using the "Display" component. Right-click anywhere in the "Desktop" and select "Properties" from the drop-down menu. Alternatively, open the Control Panel from the Start menu and click on the Display icon in the Appearance and Themes category.
Step 4
In the dialog box that opens, go to the "Desktop" tab and click on the "Customize Desktop" button. In the "Desktop Elements" window, select the icon of the required element and click on the "Change Icon" button. Select a new icon from the available list, or specify the path to your own icon. Click on the OK button, apply the new settings, close the window.
Step 5
To set your own icon for a specific file type, call the "Folder Properties" component. To do this, open the "Control Panel" through the "Start" menu, in the "Appearance and Themes" category, click on the "Folder Options" icon. Alternatively, open any folder on your computer, in the top menu bar, select the "Tools" item and the "Folder Options" command.
Step 6
In the window that opens, go to the "File types" tab and select the file type whose icon you want to change. Click on the "Advanced" button in the "Details for file type [type of your choice]" group. In the additional window that opens, click on the "Change icon" button, specify the path to the new icon and click on the OK button. Apply new settings, close the window.


