When working with documents, it may become necessary to send them to someone via the Internet (for example, using e-mail). However, in some cases, the importance of the information they contain makes it difficult to do so in plain text. Of course, the solution is encryption, which many associate with something distant and complex. Nevertheless, this task can be easily solved using a free file archiving program, for example, 7-Zip, creating an encrypted archive with its help.

Necessary
- - the Internet;
- - Microsoft Windows operating system;
- - 7-Zip archiving program.
Instructions
Step 1
Download and install. In order to encrypt a document using 7-Zip, you must first install it. To do this, go to the website https://7-zip.org/ (section "Download"), select the version of the program suitable for your computer (32 or 64 bit) and download it. After downloading, run the installer of the program and follow its instructions - this should not cause you any questions.
Step 2
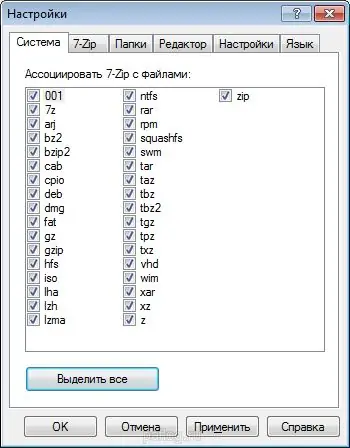
Check file associations. After installation, as a rule, 7-Zip does not change the operating system settings and does not add its section to the explorer context menu. To make these changes, you need to open the Start menu, Programs, 7-Zip and select 7-Zip File Manager. In the main menu, open the "Service" section and select "Settings …". Next, go to the "System" tab and click "Select All". Confirm the changes by clicking the "OK" button at the bottom of the program window.

Step 3
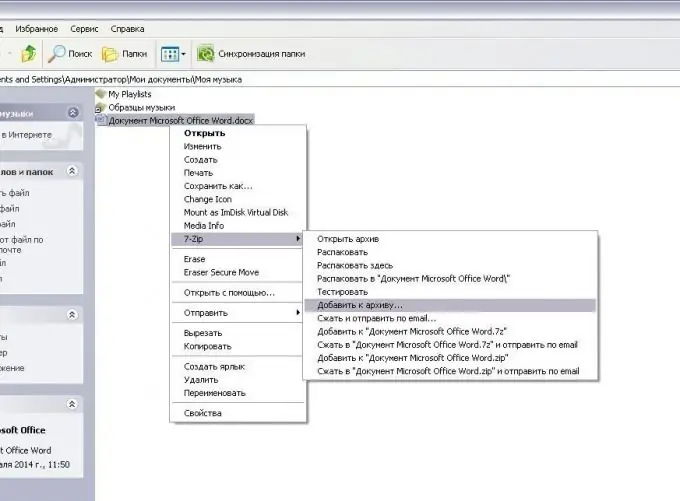
Select a document file. Any file can be encrypted, its format does not matter. To do this, open Explorer and find the file you want. Then right-click on it and select "7-Zip", "Add to archive …" in the menu that appears.

Step 4
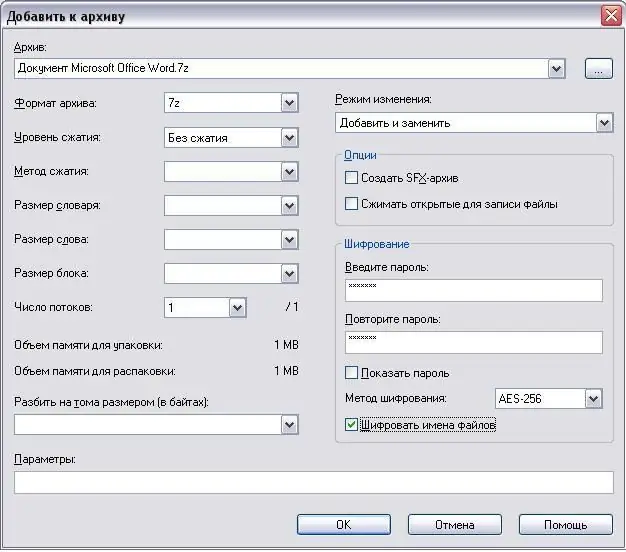
Configure the settings and run. In the window that opens, you can specify the name of the archive, the password for opening, set the encryption of file names and other settings. Please note that encryption of names is disabled by default, no password for the archive is set. After specifying all the desired settings, you can start the creation of an encrypted archive by clicking the "OK" button in the current window.

Step 5
Wait for the end. The operation may take some time depending on the size of the files being encrypted, the compression ratio, and other settings. Upon completion, an archive with the previously specified name will appear next to the encrypted files.


