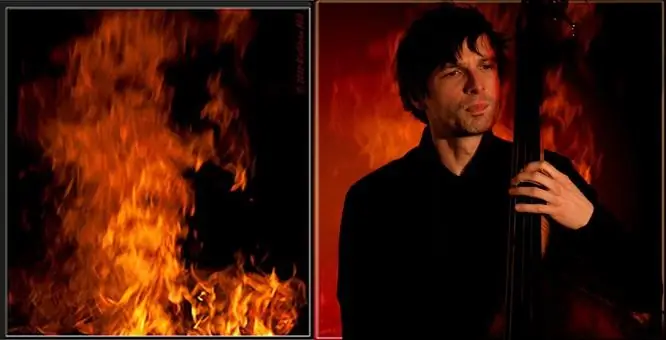
Adding texture to photos is a useful skill that can come in handy while creating artwork in Adobe Photoshop. A texture is an image that is overlaid on top of the original photo. In this case, the texture may not necessarily be a structural image. It can be any image, including another photograph (image of a flame of fire, smoke, raindrops on glass, etc.). Also, textures can be repeatedly combined to create various effects.

Instructions
Step 1
Open two images or photos in Photoshop - the original and the background. In this example, a flame image will be used as the background (texture).
Step 2
Check that the sizes of the images match. If the size is different, "adjust" the width and height of the texture to the size of the original image: Alt + Cntr + I (or the command "Image" / Image - "Image Size" / Image Size).
Step 3
Using the Move tool (V), hold down the Shift key with the left mouse button and drag the texture onto the original image.
Step 4
At the top of the "Layers" / Layers palette in the drop-down menu set the layer blending mode "Overlap" / Overlay.
Step 5
If necessary, adjust the "Opacity" / Opacity in the panel "Layers" / Layers (for example, setting 50% instead of 100%).
Step 6
To "erase" the texture layer in the local area of the photo, select the "Add a Layer Mask" / Layer Mask (Ad a Mask) button at the bottom of the Layers palette (in the form of a gray square with a white circle inside). Then select the Brush Tool and the size of the brush on the property bar. And correct the resulting image.
Step 7
The new image is ready.
Step 8
You can also experiment with other commands of the "Layers" / Layers palette menu - for example, select the "Screen" blending mode. This mode is used to create the effect of brightening the image. It is the inverse of the Multiply mode. Take two photos as an example. Here we will use the smoke image as a texture.
Step 9
If you apply the Screen mode to these images, you get such an image. In the same way, you can experiment with other modes of the "Layers" / Layers palette menu. Layering allows you to create some pretty interesting texture mapping effects. When set to a blending mode other than Normal, the active layer interacts with the underlying layer.


