When creating a new database in 1C: Enterprise, the administrator usually has a question: is it possible to fill in the Nomenclature directory programmatically from a spreadsheet document, without wasting time filling it in manually? Let's consider the simplest way to solve the problem.

Necessary
- table data file
- download processing
- database
Instructions
Step 1
Open a tabular file with data, for example Excel or *.mxl. It should contain at least the names of the directory elements. If there is any other information, for example, article and units of measure, it can also be downloaded. Let's say there are 3 columns in our document: name, full name and article. All items are a product, not a service, and are measured in pieces.
Step 2
The download processing can be found on the ITS disc. Launch the disk, go to the Technological support section, select 1C: Enterprise 8. Next, Universal reports and processing -> Loading data from a spreadsheet document -> Description and installation of external processing "Loading data from a spreadsheet document". Click the "Copy" link and save the processing to the selected folder.
Step 3
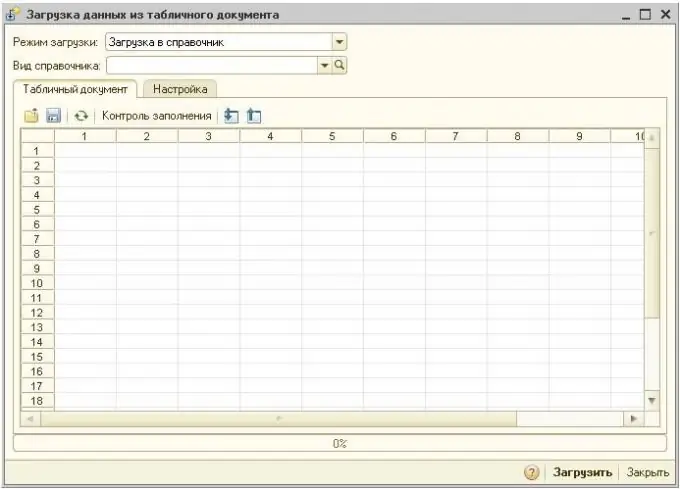
In our database, open the received processing. In the field "Download mode" the default is "Download to the directory". Set the "Nomenclature" in the "Directory type" field. Then we press the button "Open file …". In the window that opens, find a spreadsheet document and select it. Information from the file will be displayed in the tabular section of processing.

Step 4
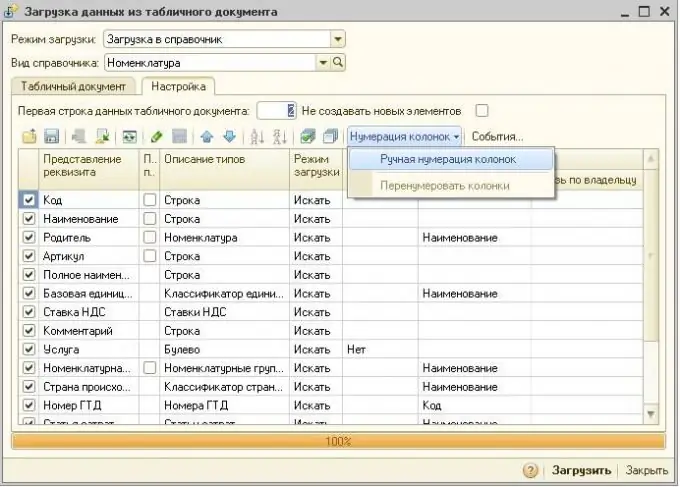
Go to the "Settings" tab. In the field "The first line of data in the spreadsheet document" we put 1 if our document does not have a header, or 2 if there is a header and the data starts from the second line. Next, in the item "Column numbering" select "Manual column numbering".

Step 5
Uncheck all the boxes using the button to the left of Column numbering. Set the checkboxes in the "Name", "Full name" and "Article" lines, leave the loading mode "Search", set the column numbers according to the column numbers in the spreadsheet document. In our case, these are 1, 2 and 3.
Step 6
If we upload elements to a folder, put a check mark in the "Parent" line, select the download mode "Install" and in the "Default value" column select the directory group we need.
Step 7
And finally, we will select the units of measurement and the VAT rate, otherwise we will have to set them manually for each element of the directory. Let's check the boxes in the lines "Base unit of measurement" and "VAT rate", the download mode is "Set", in the field "Default value" - "pcs" and "18%", respectively.
Step 8
After completing the configuration, go back to the tab "Spreadsheet document" and press the button "Fill control". If no errors were found, click "Download". Loading is complete.


