IMA files are floppy disk images. They contain a full sequential uncompressed dump of the data received from the floppy disk. Usually, files of this format are obtained by "removing" an image from a real medium. But with the help of some utilities, for example WinImage, you can create an IMA image based on arbitrary data.
Necessary
Installed program WinImage, free version
Instructions
Step 1
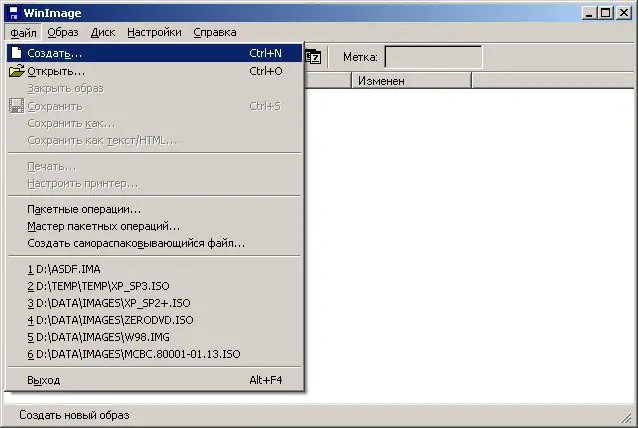
Start creating the ima image in WinImage. Press the key combination Ctrl + N or in the main application menu select the "File" and "New …" items.
Step 2
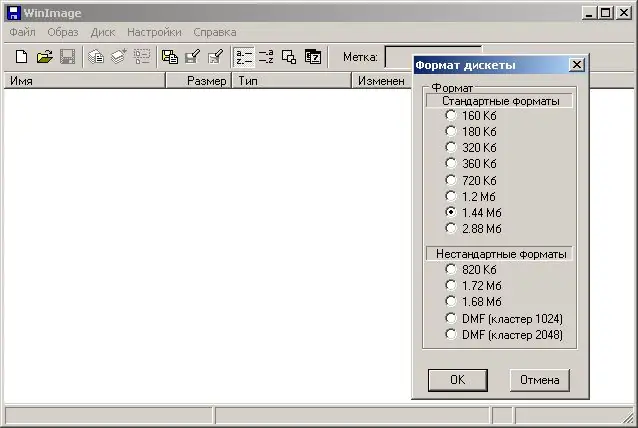
Specify the type of image to be created. In the "Format floppy disk" dialog displayed after completing the actions of the previous step, activate one of the available options. Click OK.
Step 3
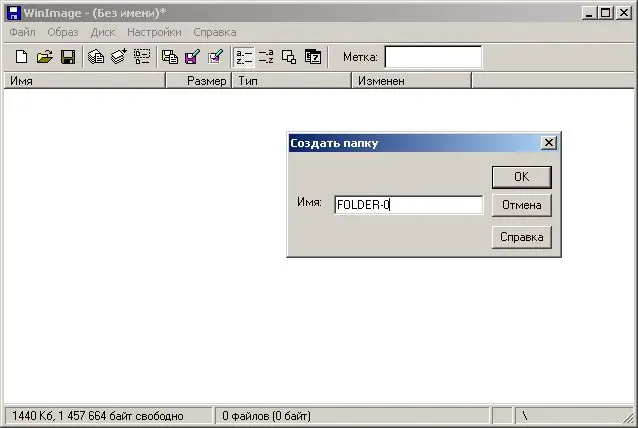
Create a directory structure that will be contained in the resulting image. In the main menu, select "Image" and "Create folder …". In the dialog that appears, enter the name of the directory and click the OK button. Repeat this step as many times as necessary. Enter directories to create child folders. To do this, use a list that displays the contents of the image.
Step 4
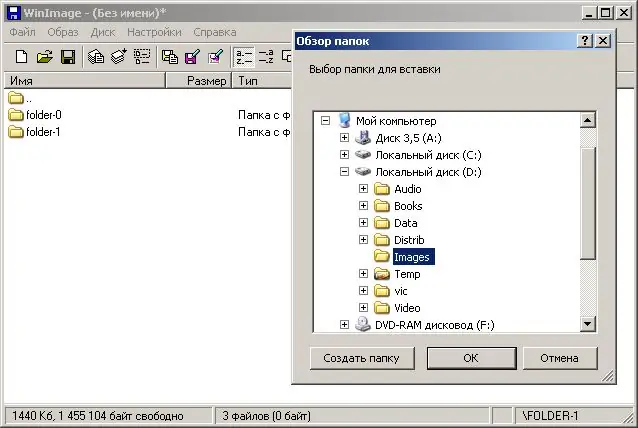
Add the contents of folders from available media to the image. Navigate to the desired directory for the image. Select "Image" and "Insert folder …" from the menu. In the displayed "Browse for Folder" dialog, select the target directory. Click OK.
Step 5
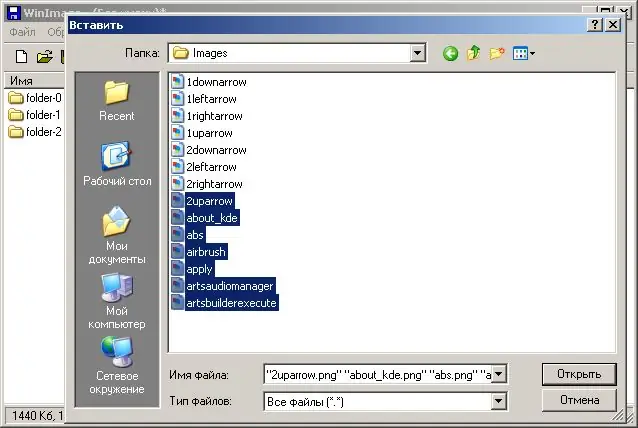
Add separate files to the image. Change to any directory of the image. Select "Image" and "Insert …" from the menu or press the Ins button. In the "Insert" dialog select the medium, go to the desired directory. Select one or more files. Click the "Open" button.
Step 6
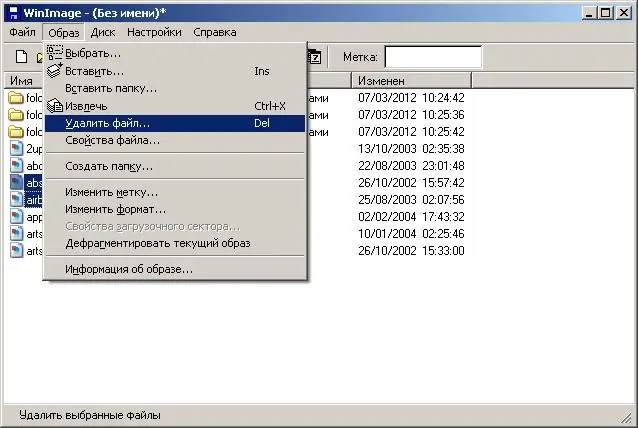
Remove files and directories that were mistakenly added to the image, if necessary. Highlight them in the list of contents of the image. Press the Del button or select "Image" and "Delete file …" from the menu.
Step 7
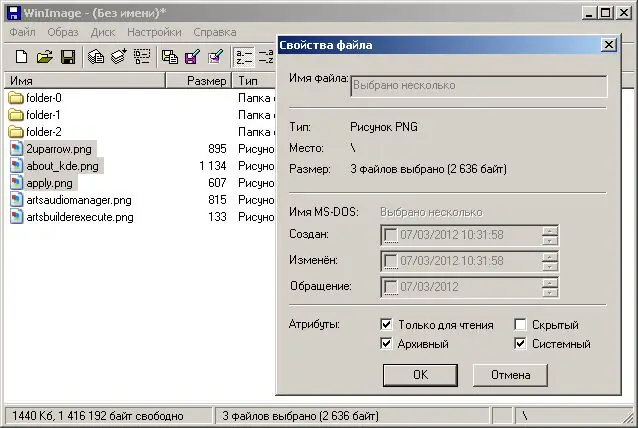
Modify the attributes of the files and folders added to the image. Select the required objects in the list. Select "Image" and "File Properties …" from the menu. In the displayed dialog, set the desired attributes. Click OK.
Step 8
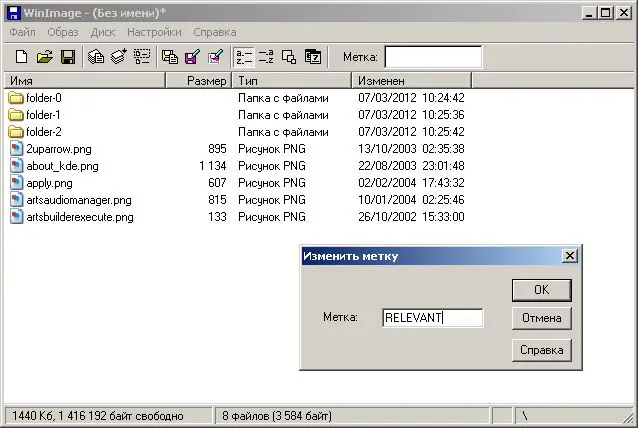
Change the volume label of the image you are creating. Select "Image" and "Change Label …" from the menu. Enter the desired value in the "Label" field of the dialog that appears. Click OK.
Step 9
Create an ima image. Select "File" and "Save As …" from the menu. In the File Type drop-down list of the displayed dialog, select Image Files (*. IMA). Go to the directory where you want to save the image file and enter its name in the corresponding field. Click the Save button.


