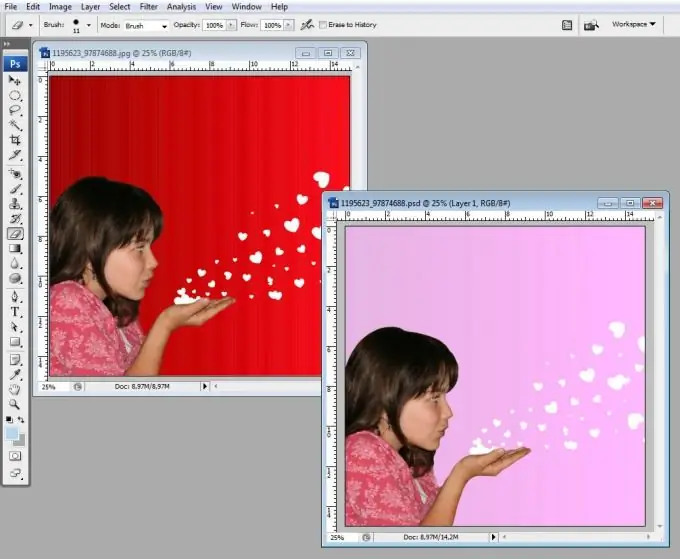
It happens that in a photograph or drawing we have chosen for some purpose, we are satisfied with everything except the color of its background. But this is not a reason to get upset and choose another image - open Photoshop and bring your photo closer to the ideal.

It is necessary
- Graphic editor Adobe Photoshop
- Photo for correction
Instructions
Step 1
Open the file in the graphics editor Adobe Photoshop. In the above example, you can see a girl on a red background. Let's take a look at how to make this background, for example, pink.
Step 2
One of the ways to accurately and accurately select the background is the "Quick Mask Mode" (Quick Mask Mode). To enter it, just press the Q key on your keyboard, or click on the Quick Mask icon, which is located at the very bottom of the toolbar, and is a circle inscribed in a rectangle.
Step 3
At first glance, nothing has changed in the workspace of the graphics editor. But if you take the Brush tool and draw a line across the photo, you will see a semi-transparent red trail. This is the Quick Mask. Anything that is not covered by the mask will be selected after exiting this mode and can be subjected to any correction: filters or color correction. That is, if we carefully paint over the girl with the Mask in this mode, and do not touch the background, we will be able to change the color of the background alone.
Step 4
As you can see, in this example, the red color of the mask creates an inconvenience, blending into the background color. But this can be fixed. Open the Channals palette from the Window menu.
Step 5
This palette contains icons with which you can work with each of the three (in this case) color channels and our Quick Mask. The Mask icon will be colored black and white. Double-click on it with the left mouse button.
Step 6
You will see the Quick Mask Options dialog box. In it you can choose the color of the mask that is more convenient for you (in this example, blue is used), as well as change its transparency. Select the settings that suit you and click OK.
Step 7
Take the Brush tool. Set in its settings (called by right-clicking on the canvas space) a convenient size for you and 90-85 percent blurring of the edges. Gently paint over anything that should not be color corrected using your mouse or graphics tablet. Zoom in on the drawing for a cleaner drawing. If you go beyond its edge somewhere, use the Eracer tool.
Step 8
Press Q again. You will see that the mask has disappeared and turned into a selection, outlining the outline of the object.
Step 9
It will be more convenient for you to work with background color correction if you transfer the object to a separate layer. To do this, press the key combination Ctrl + I, inverting the selection, and then - Ctrl + J, copying the object (in this case, the girl) to a separate layer. Opening the layers palette with the F7 key, you will see two separate layers in it. For further work, select the bottom layer.
Step 10
Use the Ctrl + U key combination to bring up the Hue / Saturation dialog box. Move the top slider to select a new background color. Then use the middle slider to adjust its saturation. Finally, move the bottom one to select a brightness level.
Step 11
If you see that there are particles of the old background in the upper image, carefully erase them with the Eraser. If you turn off the visibility of the top layer (by clicking on the eye icon), you will see how the object would have changed along with the background if it had not been selected with a mask and moved to a separate layer.
Step 12
If everything suits you, save the psd file using the "File - Save" menu, in case you want to make any other changes, and then save the corrected photo in jpeg format by choosing "Save as" from the "File" menu …


