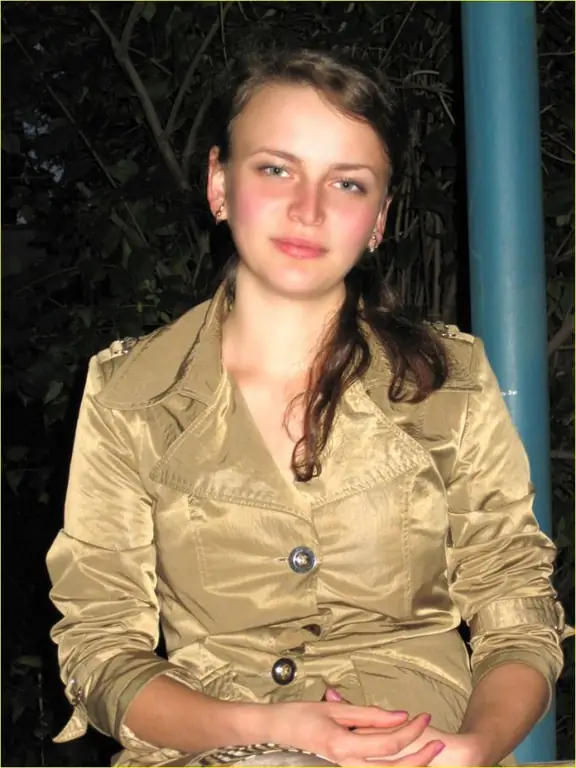
In the fairy tale about a scarlet flower, the middle daughter asked her father to bring her a wonderful mirror, looking into which the girl would see herself always young and beautiful. Today it would be enough for her to ask: "Bring me, father, a computer with an installed graphic editor Adobe Photoshop." Almost any image can be used to make a photo for a glossy magazine using this editor.

Instructions
Step 1
Open the photo. Make a copy of the main layer with Ctrl + J so as not to damage the image during retouching.
Step 2
The picture is a bit dark. To correct this flaw, select Image, Adjustments, and Levels from the main menu. In the Input Levels window, move the white slider to the left to lighten the image.
Step 3
Select the Healing Brush Tool from the Toolbox. Find clean skin on the face, hold down alt="Image" on the keyboard and click on this area. The tool will remember the pattern. Hover the cursor over the problem area and click with the left mouse button - the program will replace it with the reference fragment. Process the entire image this way.
Step 4
Now you need to correct the shape of the face and nose. From the Filter menu, choose the Liquify command. Find the Push Left Tool on the toolbar. Set the values for pressure and hardness not too high for neat retouching. When you move the cursor up, the image below it moves to the left, when you drag the mouse down - to the right. By changing the size of the brush, make the face oval narrower and the nose thinner. You can undo a failed action by clicking the Reconstruct button. Click OK when you are satisfied with the result.
Step 5
Now you need to give the image a gloss. Make a copy of the layer with Ctrl + J. Choose Filter, Blur, Gaussian Blur. Move the Radius slider until, in your opinion, skin imperfections are no longer visible. Remember this value - in this case, 2.7 pixels. You do not need to apply the filter - click Cancel.
Step 6
In the same Filter menu, go to the Other group and select High Pass. Set the value that you memorized in the previous step - 2, 7 pixels. Click OK.
Step 7
Now apply a Gaussian Blur with a radius equal to 1/3 of the value you remember. In this case, R = 2.7: 3 = 0.9 pixels.
Step 8
Invert the layer with Ctrl + I, set the blending mode to Linear Light ("Linear light"), lower the opacity to 50%. Hold alt="Image" and click on the Add Layer Mask icon in the layers panel. Choose a soft white brush from the toolbar and paint over problem areas on the face and neck, without touching the eyes, hair, eyebrows and other clear contours. Merge layers Ctrl + E.
Step 9
Now we need to lighten and darken certain parts of the image. Make a copy of the top layer with Ctrl + J. Add an inverted layer mask to it, as in the previous step (Alt + Add Layer Mask). Set the blending mode to Screen ("Lightening"), opacity 10-15%. Make sure that the layer mask is active - you should draw on it. Choose a soft white brush and, varying the diameter, lighten the forehead, cheekbones and chin of the girl. Draw a light stripe down the center of the nose. Accentuate the highlights on the lips, hair, and under the eyebrows. Merge layers Ctrl + E.
Step 10
Again, create a copy of the top layer and apply an inverted layer mask to it. Now the blending mode is Multiply ("Multiplication"), transparency - 10-15%. With a soft white brush with an active layer mask, apply shadows on the model's face: on both sides of the nose, on the temples, along the cheeks and around the chin. Darken the area around the lips and eyes, accentuate the shadows on the neck. Merge the layers.


