Sending documents for printing from the spreadsheet editor Microsoft Office Excel has almost no features in comparison, for example, with a similar operation in the word processor Microsoft Office Word. Perhaps the only difference will be that excel books are assembled from sheet tabs, each of which can be printed on several pages.

Instructions
Step 1
Make sure the printer is ready to use, that is, it is turned on, supplied with paper and toner, and connected to your computer via a network, LPT, or USB port.
Step 2
Start the spreadsheet editor and load the document you want to print into it. Go to the "Page Layout" tab and use the controls placed in the "Page Setup" and "Fit" command groups to select the most appropriate margin sizes, page orientation, print area and other settings. Clicking on the small icon in the right corner opposite the command group names opens the same window with more detailed settings.
Step 3
Use the keyboard shortcut ctrl + f2 to enable the preview window and see the results of changing print settings. If you intend to print several pages on one side of each printed sheet, then click on the icon in the right corner opposite the name of the "Sheet parameters" command group and in the window that opens, select the sequence in which the pages should be printed on the sheet.
Step 4
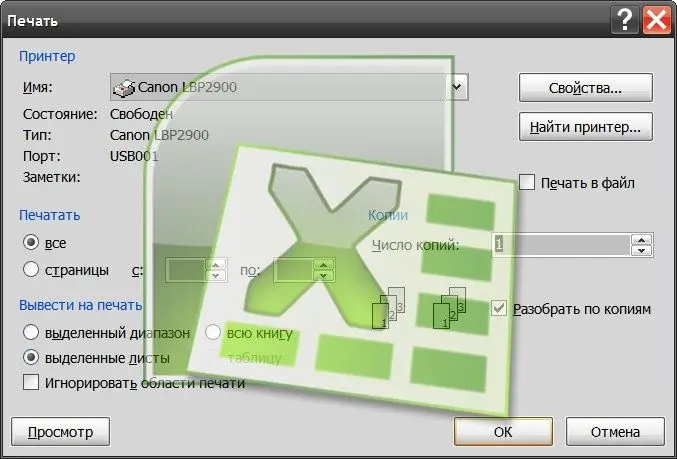
When the options for placing tables on the page are set, press the key combination ctrl + p. In the "Print" section, check the "entire book" box if you want to print all sheets of the Excel document with the selected settings. If you suppose that other settings are required for tables of other sheets, then leave a check in the "Selected sheets" box.
Step 5
Change the value in the Number of Copies field if you want to print multiple copies of the document. In the "Name" drop-down list, you can select another printer if the one that Excel selected does not suit you. If the required printer is not in this list, then find it using the dialog called up by clicking on the button "Find a printer".
Step 6
Click OK and Excel will add the document to the printer's print queue.


