Steam's interface has remained unchanged for years. It is not known why Valve does not change it at least a little, because over the years it becomes more and more unpleasant and unpleasant to look at it. If you are tired of looking at the outdated standard Steam interface, then you've come to the right place. Let's replace it with something more pleasing to the human eye.

Instructions
Step 1
If the Steam client is already installed on your computer, then open your browser and go to the "metroforsteam" site. It will not be difficult to find him, since he is the first in the search results. Here we will select a new interface for such an old, but not useless program.

Step 2
On the main page of the site, or rather in the upper right corner, click on the "Download" button, save the archive to any place on your computer. The main thing is not to lose it, otherwise you will have to download it again.

Step 3
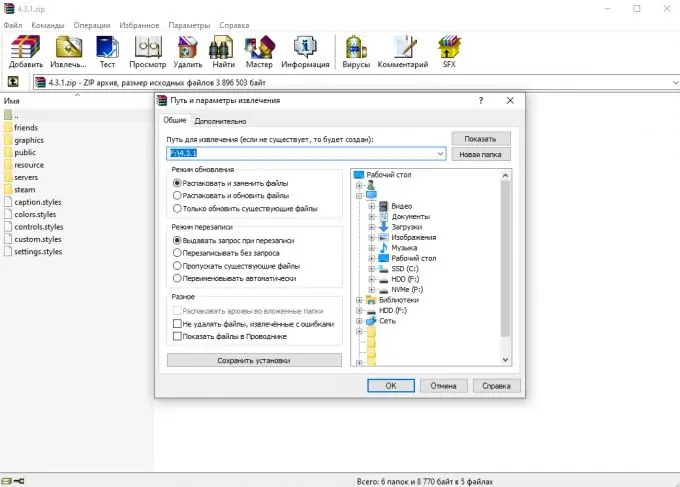
This is followed by unpacking the contents of the archive to any point on the computer. The logic remains the same - don't forget where you extracted the files. Otherwise, you will have to download it again.
Step 4
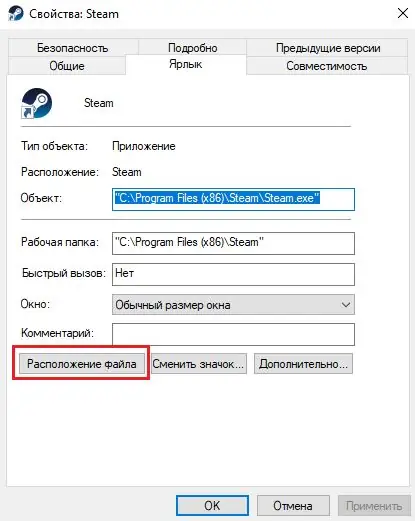
We manually find the location of the Steam client or use a simple life hack that will definitely improve your future life:
Right-click on the Steam client shortcut - Poke the "Properties" line - Poke the "File Location" button and we will open the folder where the shortcut from the Steam client is located. This manipulation can be done with any shortcuts on the computer.
Step 5
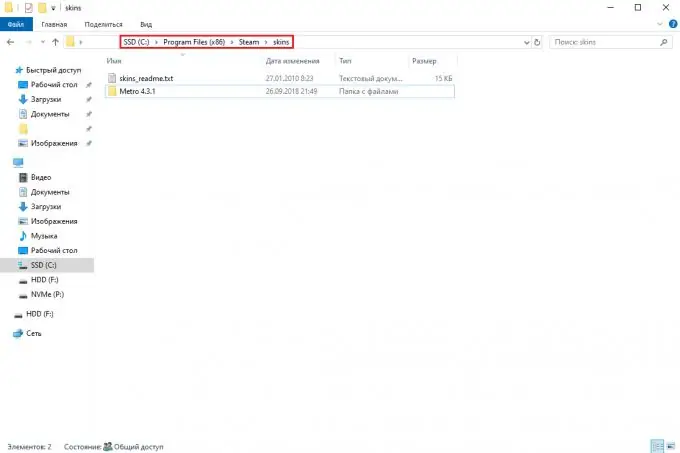
Here we need to find a folder with the name "Skins" and transfer into it the folder that we extracted when unpacking the archive a few steps earlier.
Step 6
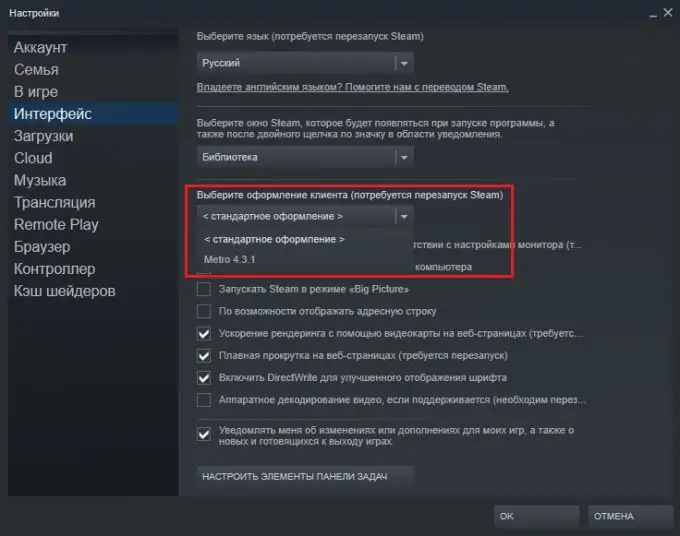
The pre-installation is complete. Next, launch the Steam client, select the "Interface" item in the settings, find the line "Select the client design", select the interface we downloaded and agree to restart the program. After the restart, the Steam client interface will radically change to one that is definitely more pleasant than the standard one.
Step 7
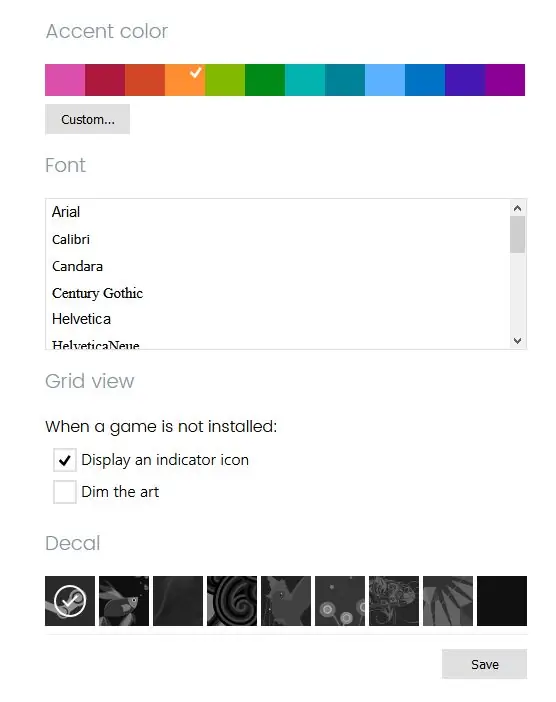
In case you want to slightly adjust the new interface for yourself, the developer has provided the ability to change the color of active elements, fonts and add decals. On the site, especially for such purposes, there is a separate button, a brush on the top right, where all this can be easily selected to your taste and color.
Step 8
After choosing the color of active elements, fonts and decals, click on the "Save" button. Again, do not lose the downloaded file on your computer. Go back to the folder with the new Steam client interface and replace the file named "custom.styles" there with the one you just downloaded from the site. That's all, customize the new interface however you like, replacing the downloaded "custom.styles" file in your Steam client folder each time.


