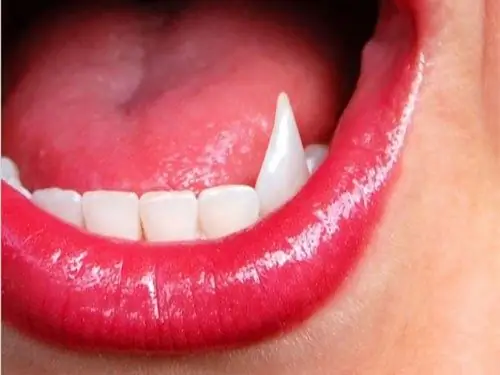
Professional bitmap editors such as Adobe Photoshop provide the most powerful tools for modifying photos today. The created effects go beyond the usual reality. For example, in Photoshop, you can make fangs by presenting a character in a photographic composition in the form of a vampire.

It is necessary
- - Adobe Photoshop;
- - a file with a photo for processing.
Instructions
Step 1
Open the photo you want to make the fangs in Adobe Photoshop. Select "Open…" in the File section of the main menu, or press Ctrl + O together. Specify the file in the dialog that appears. Click Open.
Step 2
Select one of the teeth from which the canine will be formed. Activate the Zoom Tool. Set a convenient scale for viewing this fragment of the image.
Step 3
Create a selection around the tooth. It is convenient to do this using the Magnetic Lasso Tool or Polygonal Lasso Tool. If necessary, correct the selection in the quick mask mode or using the Modify section of the Select menu.
Step 4
Copy the tooth image to a new layer (in parallel with its creation). Select the menu items Edit, Copy and Edit, Paste. You can also use the keyboard shortcuts Ctrl + C and Ctrl + V.
Step 5
Activate the image warp mode. Press Ctrl + Shift + D or use the Reselect item on the Selection menu to restore the previous selection. Sequentially select the items Edit, Transform and Warp from the main menu. A grid appears around the image of the tooth.
Step 6
Make a canine from a tooth. Move the nodes of the mesh to achieve the desired shape. After finishing the transformation, double-click on the center of the mesh or select any tool on the panel and click Apply in the query dialog.
Step 7
Blend the images of the transformed and original teeth that are in different layers. Activate the Eraser Tool. By clicking on the Brush control in the top panel, select a brush of the appropriate type, diameter and hardness. Set the Opacity to 10-20%. Erase the edges of the top layer image with the Eraser Tool until there are no visible borders between it and the background image.
Step 8
Evaluate the result of the work. View the composition at different scales. Make sure there are no errors. Follow steps 2-7 to add the desired number of canines.
Step 9
Save the modified image. Press Shift + Ctrl + S or click on the "Save As …" item in the File menu. In the dialog select the format and file name. Click the Save button.


