Elements located on the desktop help the user to optimize their work on the computer, facilitate access to files and folders located on different local drives. Familiar desktop settings provide comfort, and if something suddenly goes wrong, performance can drop, and mood can spoil.

Instructions
Step 1
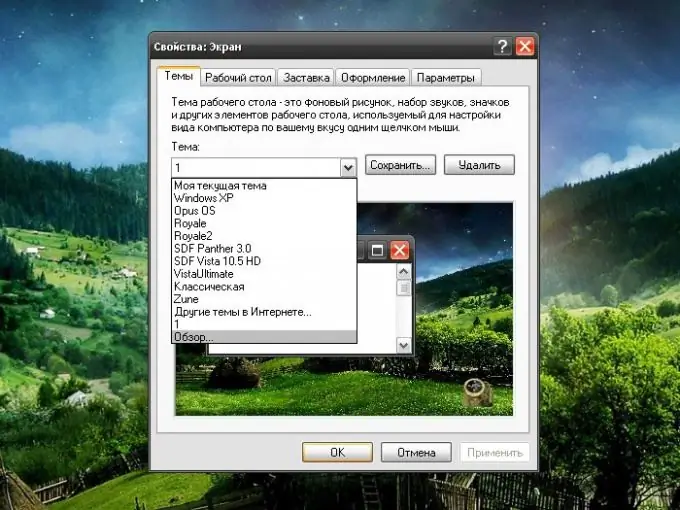
Basic desktop settings are made using the "Display" component. It can be called in several ways. Open the Control Panel through the "Start" button. In the "Appearance and Themes" category, left-click on the "Display" icon. Alternatively, right-click anywhere on the desktop and select Properties from the context menu.
Step 2
Moving through the tabs, apply the settings to your liking. After you have set the desired options for the desktop, save them in a separate file. To do this, go to the "Themes" tab and click on the "Save" button in the "Theme" group. Specify the directory to save the file and remember it.
Step 3
If necessary, you can always return to the previous settings. To do this, call the "Display" component and open the "Themes" tab again. In the "Subject" group, expand the drop-down list and select "Browse". In the new dialog box, specify the path to the previously saved file with the theme and commit the changes made with the "Apply" or OK button.
Step 4
If you've accidentally deleted your desktop shortcuts, you'll have to manually revert them. Although here, too, you can resort to a certain trick. Using the same Display component, call the Desktop Cleanup Wizard. To do this, open the "Desktop" tab and click on the "Desktop Settings" button. In the additional window "Desktop Elements" open the "General" tab and click on the "Clear Desktop" button.
Step 5
When the Wizard starts, mark all shortcuts as unused. They will all be moved to a new "Unused Shortcuts" folder that will automatically be created on the desktop. Open this folder, select everything, right-click on the selection and select "Send" from the context menu and the sub-item "Desktop (create shortcut)". Any shortcuts missing from the desktop will be restored. Move the folder "Unused shortcuts" to the directory in which it will be stored until an emergency.


