USBasp programmers are often used to program microcontrollers. But if in Windows 7 and older operating systems the driver was easy and simple to install, then in new versions of Windows 8 and Windows 10, you first need to do certain manipulations.
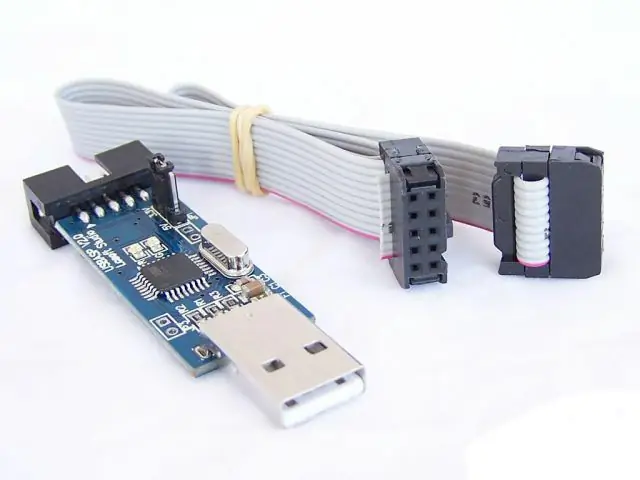
Necessary
- - a computer with an internet connection;
- - USBasp programmer.
Instructions
Step 1
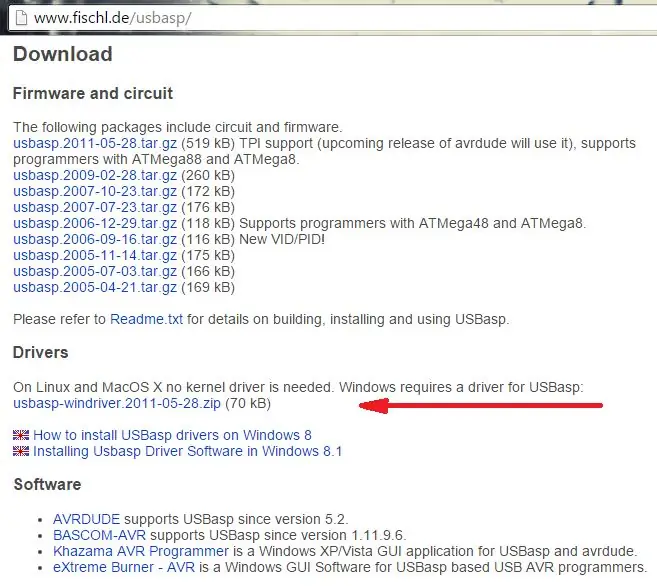
Go to the site https://www.fischl.de/usbasp/ and download the driver "usbasp-windriver.2011-05-28.zip". Unpack the archive to your hard drive.
Step 2
To install a driver in Windows 8 or Windows 10, you need to disable the digital signature verification of drivers. This is how it is done.
Press the Shift key and click on the "Restart" button. We select the option "Diagnostics" (Troubleshoot).
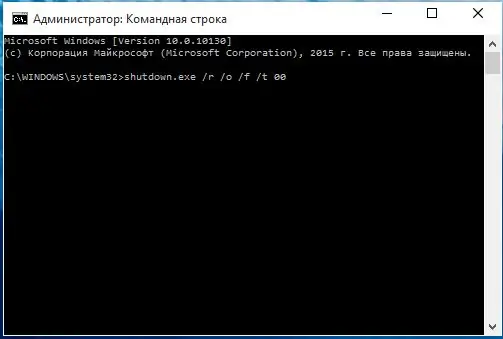
The second option - enter in the command line launched with Administrator rights: "shutdown.exe / r / o / f / t 00".
Step 3
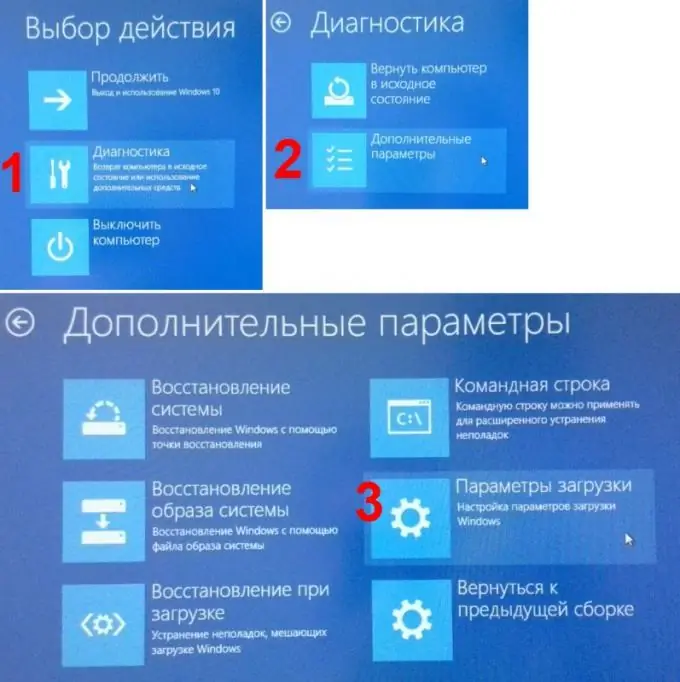
A window for selecting reboot options will appear. We choose the second option - "Diagnostics" (or Troubleshoot). Next, select "Advanced options". Next - "Boot Options".
Step 4
A message will appear stating the reboot options in diagnostic mode. Press the "Restart" button.
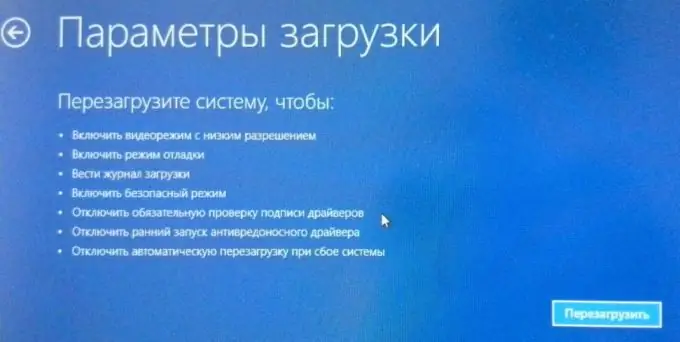
Step 5
The computer restarts and prompts you to select various boot options with the number keys or F1-F9. We are interested in option number 7 - "Disable mandatory driver signature verification". We press the F7 key.
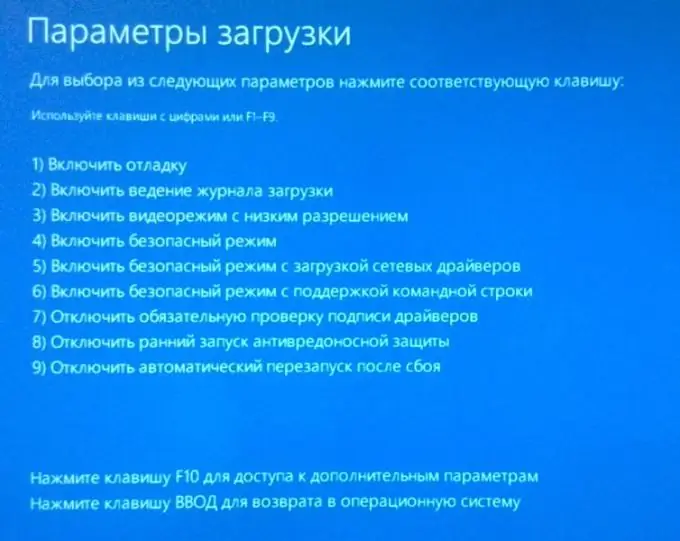
Step 6
After the final boot of the computer, we connect the USBasp programmer to the USB port of the computer. The device is detected and appears in the device manager under the name USBasp. Click on it with the right mouse button. We select "Update drivers …". Select the previously downloaded and unpacked driver. Despite the warning from the security manager, install the driver.
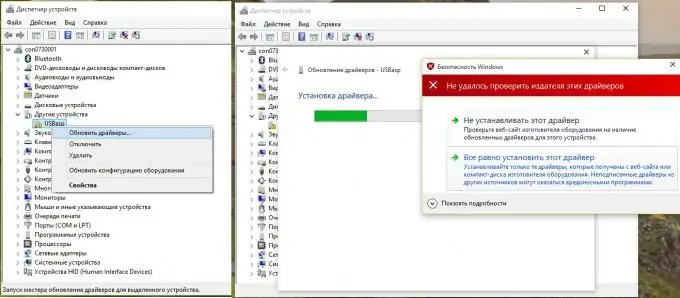
Step 7
Upon completion of the installation, the system will inform you about the successful completion of the Windows 8 or Windows 10 driver update, and the programmer will appear in the device manager under the name USBasp without a yellow triangle. You can now use your programmer.


