The Windows operating system has a special component, the purpose of which is to execute tasks scheduled by the user according to the schedule, which he also creates. There is also a utility in this OS that launches the system shutdown procedure. Combining the capabilities of these two programs allows you to schedule an automatic shutdown of your computer on a schedule.

Instructions
Step 1
If you only need a one-time shutdown of the computer after a certain time, then there is no need to use the task scheduler. The shutdown utility has its own timer, with which you can set the desired delay for starting the shutdown procedure. If you have Windows XP installed, use the program launch dialog to invoke this utility.
Step 2
Press the Win button and in the main menu find and click the "Run" item. In the window of the dialog that appears, type the shutdown command and add two keys / s / t after a space. Then put another space and indicate the time after which the computer should be turned off. The time for this program must be set in seconds - for example, shutdown / s / t 600.
Step 3
Click on the OK button and the timer will start counting the time remaining until shutdown.
Step 4
In Windows 7 and Vista, you can do without the program launch dialog. Open the main menu and immediately start entering the command - you will see everything you typed in the search field. At the end of the entry, a single line will appear in the list of search results, in which the specified command will be duplicated - click it and the countdown will start.
Step 5
If you need to schedule a shutdown of your computer for a specific date or do it regularly, on a schedule, assign the shutdown utility to the task scheduler. In Windows 7, accessing it is very simple: press Win and type "plan" - the link to launch the application will be in the first line of search results. In Windows XP, to search for the desired link, open the "All Programs" section in the main menu, go to the "Standard" subsection, and from it to the "Service" section. The link to run the scheduler is referred to here as Scheduled Tasks.
Step 6
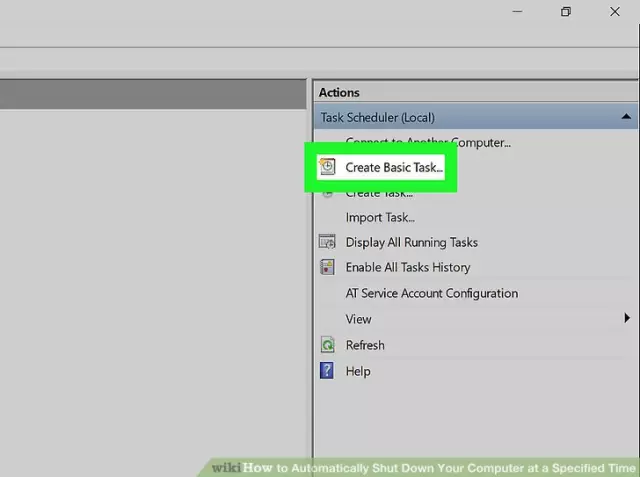
In the Windows 7 Task Scheduler, find and click the "Create a simple task" command in the right column. Fill in the "Name" field in the wizard that starts and click the "Next" button.
Step 7
Choose from seven options the required frequency of launching the computer shutdown utility and click "Next" again. In the next form, you need to specify the time and the total number of launches of this application. Click the "Next" button again in this form and repeat the click in the next one, without changing anything in the settings.
Step 8
Open the search dialog for the required application with the "Browse" button and find the shutdown.exe file in the System32 folder of the OS system directory. In the Add Arguments box, type / s, and then click Next again. In the next form of the wizard, click "Finish" and the task scheduler will start working according to the schedule you created.
Step 9
In Windows XP, jobs are created differently. After starting the scheduler, click on the "Add task" line and in the first wizard form that appears, find the file specified in the previous step - the search dialog and here it opens with the "Browse" button.
Step 10
Click the "Next" button, enter the name of the task being created and select the frequency of its execution. After the next click on the inscription "Next", set the exact time, day, date, other time parameters and click "Next" again.
Step 11
Enter the user password twice, if it exists for your account, click "Next" and check the box "Set advanced options …". Click the "Finish" button.
Step 12
In the "Run" field, add the / s key separated by a space to the entry already there and click OK. This completes the procedure.


