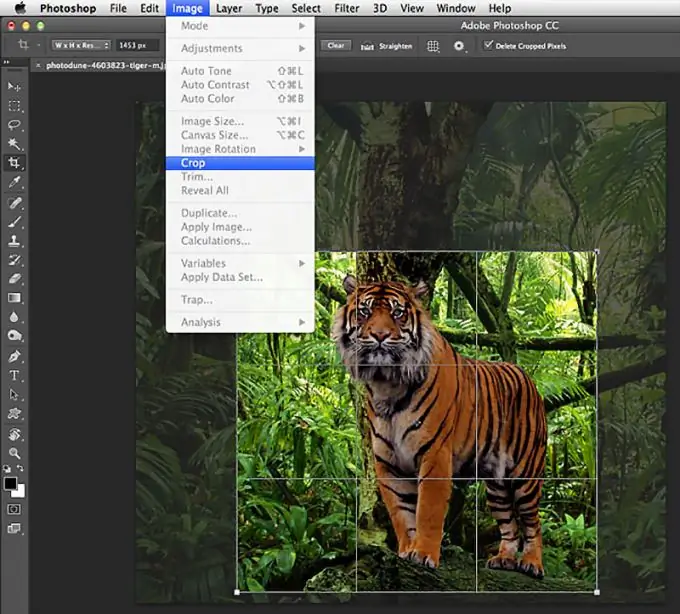
The first thing to do when processing a photo is cropping. By cutting off unnecessary areas of the background, you can significantly improve the image, draw the viewer's attention to the subject, and correct an unsuccessful composition. In Photoshop, cropping is done using the special Frame tool.

How to work with the frame tool
This tool is easy to use. In newer versions of Photoshop, crop boundaries are automatically set to the edges of the image when you select Frames. The cropping area can be edited by dragging the frame using the handles located at the corners and in the center of each side. As soon as you release the mouse button, the areas to be cropped will turn dark.
To move the crop frame while creating it, press and hold the Spacebar. When it is in the right place, release the "Space" and continue drawing the frame. You can expand it by moving the mouse pointer outside the outer border. The cursor will then change to a double-headed arrow. Click on the image and move the mouse pointer. The frame will unfold in the indicated direction.
After defining the cropping boundaries, press Enter. The outer edges of the picture will be removed. If you're cropping an image that has multiple layers, you can choose to have Photoshop hide the cropped sections instead of deleting them. To do this, on the Options panel, set the Trim switch to Hide. Now you can return the cropped area using the "Image" - "Show All" command.
If you want to crop an image of a specific size, enter Width and Height values in the Options panel. You can also keep the aspect ratio of the original image or set specific aspect ratios.
How to straighten a photo
If the horizon in your photo is obstructed, you can straighten it using the Perspective Crop tool. It is located under one button with the "Frame" and is also called using the hotkey C. To switch between tools, use the combination Shift + C.
Create a crop box around the element you want to straighten, and drag the corner handles so that they are parallel to the image lines. Hit Enter. This method works well for architectural shots, but do not use it for cropping photographs of people or animals. The tool distorts the proportions and living creatures will look like in a crooked mirror.
You can use the Ruler tool to straighten your photo. It is hidden in the Eyedropper toolbox and is invoked by the I hotkey. Position the cursor at the point from which the measurement should start and draw a line across the area to be aligned. On the Options panel, click the Straighten button. The photo will be straightened and cropped.
Crop principles
Even a good shot can be ruined by poor cropping. When cropping a photo, try not to place the subject in the geometric center of the image - this technique is suitable only for images of static monumental objects. Don't leave too much space at the top of the photo - the photo will look blank. If you want to show the subject in close-up, then as a result of cropping it should occupy 70-80% of the picture.
If the photograph shows a moving subject, it should not rest against the edges of the photograph. Leave plenty of space in the direction of travel. Better to place it on the right side of the photo. In this case, the viewer's gaze and the object seem to move towards each other. If necessary, you can unfold the image using the command "Edit" - "Transform" - "Rotate horizontally".
Photos of roads, rivers, fences will look more dynamic if you arrange these objects diagonally across the image. At the same time, the composition, directed from the upper right corner of the image to the lower left, looks calmer.
"Golden ratio" and "Rule of thirds"
To create a harmonious image, professional artists apply the Golden Section principle. It has been noticed that regardless of the aspect ratio, the four points of the composition always attract the viewer. They are located at a distance of 3/8 and 5/8 from the respective edges of the plane. The main objects should be located near these points.
The Rule of Thirds is a simplified version of the Golden Ratio. When applied, the image is visually divided into three parts horizontally and vertically. In this case, the horizon should coincide with one of the horizontal lines, and the main survey objects are located near the intersection points.
In the latest version of Photoshop CC, the Frame tool has got another handy feature. When cropping, the program automatically displays a grid that allows you to divide the image into parts. In this case, in the "Options" panel, you can choose between several types of mesh: "Rule of Thirds", "Grid", "Diagonal", "Triangle", "Golden Ratio", "Golden Spiral".


