The service menu allows you to access TV settings that are not included in the normal OSD menu. In addition, it allows you to perform some service operations of testing the operation of the central microcontroller, through which all the main functions of the TV are controlled. Each manufacturer uses its own algorithm for enabling such a menu - below is the required sequence of actions for Toshiba TVs.

Instructions
Step 1
Turn on the TV using the power-on button on its body and wait for the image to appear on the screen. For the next steps, you will need a remote control - take it, but do not move far from the TV, as the controls located on its body will also be involved in the operation.
Step 2
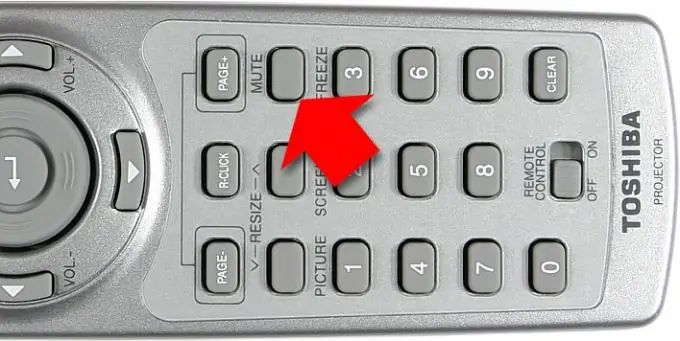
Start with the remote control - the first step in the sequence should be to press the mute button on it. This button is marked on the body of the remote control with the mute inscription and is located on the right in the first row of the lower section of buttons. Depending on the used model of the remote control device and the TV itself, the function of this button may be combined with the command to go to the next teletext page and have the inscription page +.
Step 3
Press the same button again, but this time do not release it.
Step 4
Press the on-screen menu entry button on the TV body while holding down the mute key on the remote control - this button should have a corresponding inscription (menu). If the Toshiba model you are using does not have such a button on the TV case, then look for a small hole on it, behind which is a microswitch. This control can also be marked with the label menu. Press the microswitch with any means at hand - a match, toothpick, hairpin, needle, etc.
Step 5
An indication that the service menu of the TV is activated should be the appearance of the letter S in the upper right corner of the TV screen. When the service menu is completed, use the power-off button on the TV to exit it.


