After uninstalling Norton products from your computer using a standard uninstaller, you often lose access to Internet sites. The fact is that the standard Norton uninstaller is not always able to completely remove the program. To avoid this problem, when uninstalling Norton products, you should use Microsoft Windows tools, and, if necessary, the special utility Norton Removal Tool.

Necessary
Norton Removal Tool
Instructions
Step 1
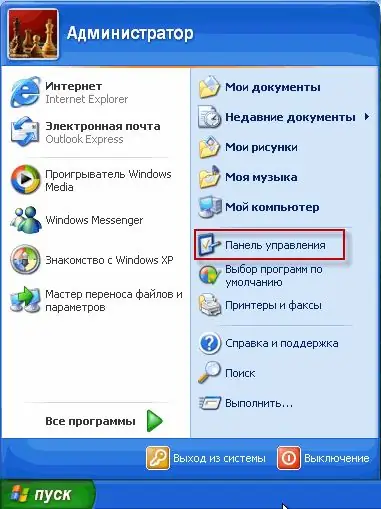
Press the "Start" button. Go to the "Control Panel" menu.

Step 2
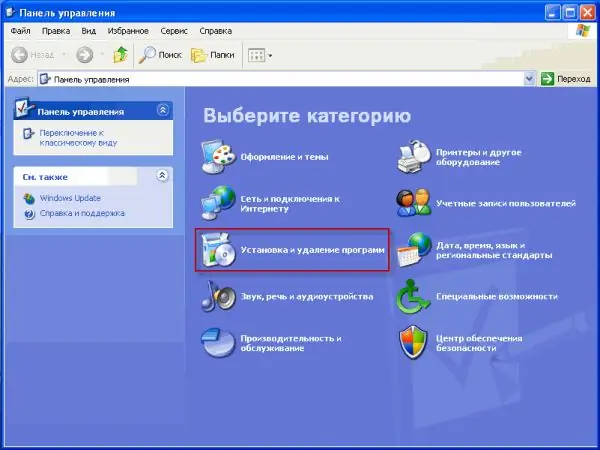
Go to the "Add or Remove Programs" section.

Step 3
In the list of programs we find the Norton antivirus. Click "Delete / Change". In the opened window of the installation wizard, click on the button "Delete all user data, including saved passwords and quarantine contents", then on the "Next" button.
Step 4
After the uninstallation process is complete, which takes about a minute, you will be prompted to restart your computer. In the installation wizard window, click "Restart now".
Step 5
If the uninstallation process was successful, then no additional action is required. However, if after restarting the computer an error message appears, or a message stating that the uninstallation was not completed successfully, you should use the special utility Norton Removal Tool by downloading it from the official website of Symantec.
Step 6
After downloading the Norton Removal Tool, launch it by clicking on the application icon. Then follow the instructions on the screen. During the uninstallation process, the computer may restart several times. After rebooting, you will be prompted to repeat some of the steps if necessary.


