Among the various useful functions of Windows 7, one can separately highlight the function of effective intranet communication between computers - in particular, if you have only one printer for all several computers on the internal network, you can easily configure shared access to the printer so that the user of each computer connected to the network environment, could use it and print the necessary materials.

Instructions
Step 1
To connect to a shared printer, open Start and select the "Devices and Printers" option. Also this option, if it is not in the Start menu, can be found in the Control Panel section. A window will open in which you will see a list of printers and faxes installed on your computer. Select the printer that is currently installed and functioning properly, and then double-click on the "Printer Setup" option.
Step 2
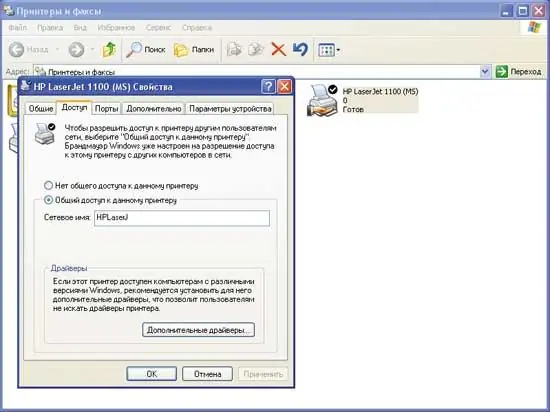
A window with the settings for your printer will open. Click on the "Access" tab and in the "Sharing this printer" section, check the box, and in the line below specify the network name of the printer, which will identify it on the internal network. Click the Apply button.
Step 3
In some cases - for example, if you are using not Windows 7 x64, but Windows XP x86, or if one of the computers on the network has an x86 operating system, open the "Additional drivers" section of the settings and check the "User mode" section in the x86 section. Now click OK and connect to the network.
Step 4
Open the Network Neighborhoods section of your computer to make sure the printer is being shared on the internal network. On another computer, open the Network Neighborhood section in the Control Panel and select the "Show Workgroup Computers" option.
Step 5
You will see the icon of the main computer with Windows 7 installed appear in the list. Double-click on this icon, and then find the network printer and install the driver by double-clicking on it. Print a test page to make sure the network printer is working on the local network.


