Adobe Photoshop is one of the most widely used image processing programs. With its help, you can change your appearance, figure, and even "swap bodies." This application provides unimaginable scope for creativity.

Necessary
- - computer;
- - skills in working with Adobe Photoshop.
Instructions
Step 1
Launch Adobe Photoshop, select File - Open and select the image file you want to change the eye color. Or just drag the photo into the program window. Double click on the background layer to convert it to working.
Step 2
Use the Magic Wand Tool to select the eye color. First, zoom in on the photo using the Zoom tool, or by pressing Ctrl + Space. Next, select the magic wand and click on the eye color in the image. This tool selects areas of similar color. To change the capture area, experiment with the sensitivity of the tool on the panel.
Step 3
Use the Quick Selection tool, with its help you can select any area of the image with a similar color. Click once on the eye color and the area will be selected automatically. In the panel, you can select Exclude From Selection to adjust the selection.
Step 4
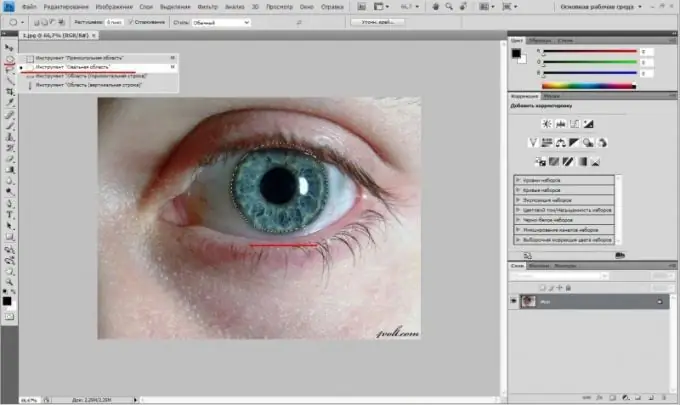
Use tools in the Lasso group, such as the Magnetic Lasso. Select the tool, click once on the border of the pupil and color, drag around the circle and double-click it. If the shape of the pupil in the photo is close to round, you can use the Oval Selection tool, select the desired area size and simply click on the pupil.
Step 5
Use a selection in mask mode. To do this, click on the "Selection Mask" button on the tool palette, select the "Brush" tool to select the eyes in the photo. Set the brush to the maximum stiffness and size. Use a round brush shape. "Draw" the desired area on the photo, if necessary, correct it with the eraser. The selected area will be colored red. Click on the "Mask" button on the palette again. The drawn area turns into a selection.


