You can save photos as a keepsake in various ways: print them and place them in an album, edit them into a slideshow, a video or create a collage. Moreover, to make a collage of photos, you can even use simple graphic applications.

Necessary
- - "Photo Collage" program;
- - digital photos.
Instructions
Step 1
To create a photo collage, you need a special program, for example, "Photo Collage". In advance, select and arrange in one folder the photos from which you are going to create a collage.
Step 2
Run the program and select the "Create a new project" item. Indicate the type of project: clean (here you will need to create everything yourself), page templates or collage templates.
Step 3
If you have selected the "Page Templates" item, in the left part of the new window specify the project style: simple, textured, chaotic, palaroid style, original. If you decide to go straight to the selection of templates, indicate which style you want to apply to your collage. There are several of them in the program: simple, children's, wedding, New Year's, seasons, travel, ancient, abstract.
Step 4
For the convenience of working in the program there is a preview window, which presents the types of possible collages. Choose the most suitable photo design and click the "Next" button or double-click on the collage you like.
Step 5
In the next window, set the page parameters: width, height, image resolution, page orientation (portrait or landscape) or leave the default settings. Then click the "Finish" button.
Step 6
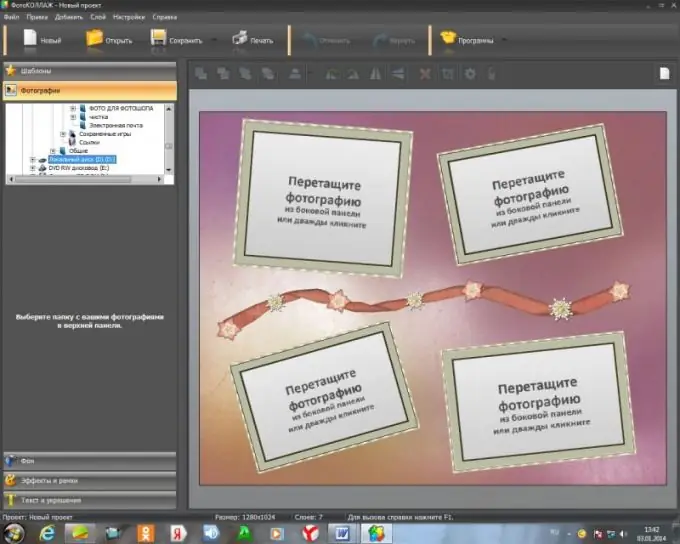
Next, a template for your future collage will open in a new window, in which you will only have to add the previously selected photos. To do this, in the left part of the working window, specify the location of the folder with images, open it and drag the photos onto the template. If necessary, you can resize the photo directly on the template by dragging the corner of the image frame.
Step 7
At the bottom of the working window there are items "Background", "Text and decorations", thanks to which you can give your collage individuality and originality. In the "Background" section, you can choose a background color, texture, gradient, or set any other image as the background of the photo. To do this, press the "Select Image" button and open the folder with the picture you need. Select the type of background design: center, stretch, or fill. In the Text & Decorations menu, you can add text, themed pictures, or shapes to your photo. In the menu "Effects and Frames" - apply masks, filters.
Step 8
When the collage is complete, click the Save button in the toolbar at the top of the screen and select one of the suggested save options.
Step 9
You can print the finished collage right in the program. To do this, click the "Print" button with the printer icon, select the printer, specify the print settings and click "Print".


