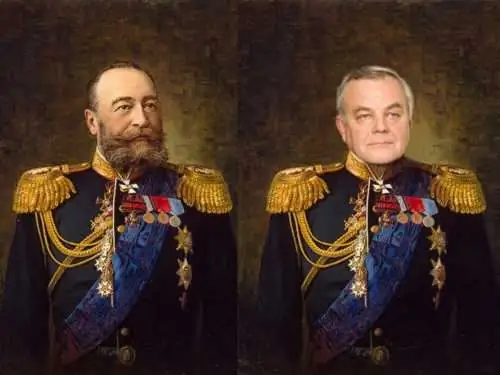
What if you urgently need to replace the faces of people in your photos? The graphic editor Photoshop will help you, with which you can realistically insert the face of one person into the photo of another. Photoshop allows you to achieve the perfect merging of faces, if you approach this issue thoroughly and use wisely the tools that the graphics editor offers us.

It is necessary
Adobe photoshop
Instructions
Step 1
Open two photos from which you will collect one image. Choose a photo in such a way that people are depicted in them in close proportions and scales, have approximately the same head rotation and similar color and light parameters.
Step 2
Start with a photo from which you will cut out the face for further pasting. Outline the face using the Lasso Tool or the Rectangular Lasso Tool. It is not necessary that the entire face silhouette is included in the outline, the main thing is that facial expressions and basic features are preserved. Close the selection, right click on it and set the Feather value to 5 px. Then copy the selection to a new layer (Layer via copy).
Step 3
Now open the second photo in which you will replace the person's face with a new one.
Create a new layer (Ctrl + Shift + N) and place the cut face from the first photo on it.
Open the Edit menu and choose Free Transform. Resize the inserted face to fit proportionally on the new photo object. It may need to be narrowed slightly, perhaps expanded or tilted. Make sure the facial features in the new look are realistic and proportional.
Step 4
To ensure that the color and texture of the skin of the original person and his new face do not differ from each other, use the color correction and brightness commands. For the layer with the updated face, select New Adjustment Layer from the Layer menu, and in it - Hue / Saturation. Check the box next to Use Previous Layer to Create Clipping Mask and manually adjust the brightness and saturation parameters. To correct the brightness, create a new layer and make it look as natural as possible. No one should guess that the face in the photo belongs to another person.
Step 5
Make the final adjustments. Take the Eraser Tool, select the appropriate size and softness, and then erase all unnecessary in the area of the inserted face. Only the main features should remain, the shape of the head remains the same on which you inserted the new look.
Step 6
If the person in the photo needs to darken or lighten some areas on the face, use the Burn and Dodge tools.


