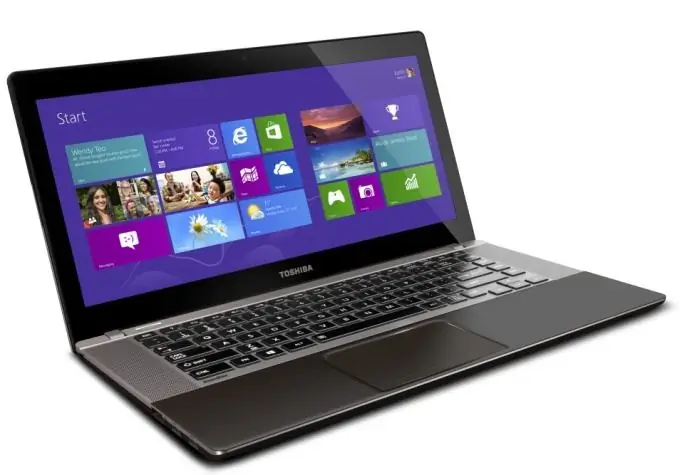
The Toshiba Satellite U840W laptop is designed in such a way that in order to upgrade the memory or hard disk, to replace the thermal paste on the processor or to clean the cooler, the laptop must be disassembled. Climbing inside a computer without knowing where to start is a very risky operation. So here's a step-by-step guide to disassembling your Toshiba Satellite U840W-C9S laptop.
It is necessary
- - laptop Toshiba Satellite U840W-C9S;
- - Screwdriver Set.
Instructions
Step 1
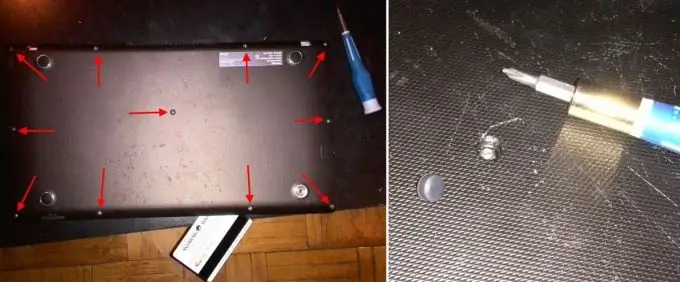
We turn off the computer. Unscrew all the screws on the underside of the laptop. Remember that there is also a screw under the rubber plug in the center of the cover. A total of 11 screws. Gently pry off the bottom cover and lift it up. It is convenient to do this with a plastic card so as not to scratch the case. Just walk the card around the entire perimeter to unfasten the latches.
Step 2
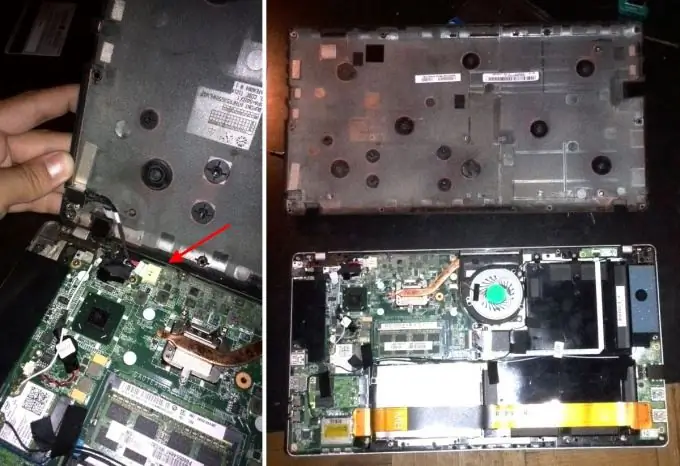
Carefully remove the power cable connector to release the bottom cover. Now we have everything at a glance.
Step 3
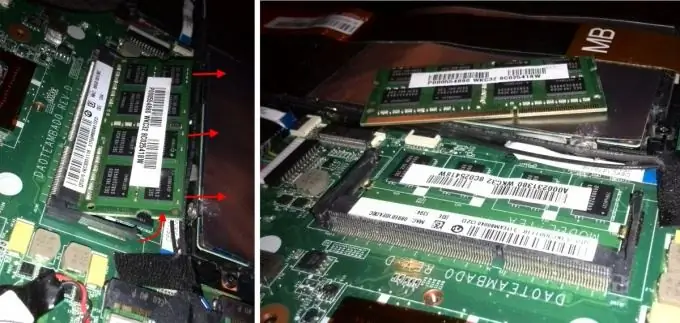
We take out the memory module by sliding the two latches on the sides of the memory module and pulling the module away from the connector.
Step 4
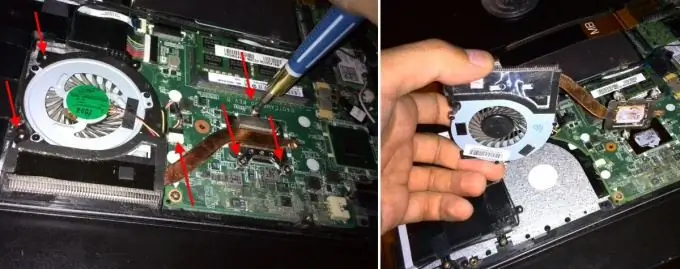
To remove the processor cooling cooler, unscrew 2 screws around the cooler itself and 3 more screws directly above the processor. Disconnect the power connector carefully by pulling away from the connector. It does not have any retainers, it opens without tricks. That's it, now the cooler can be removed. We lift it up and it can be easily dismantled.
Step 5
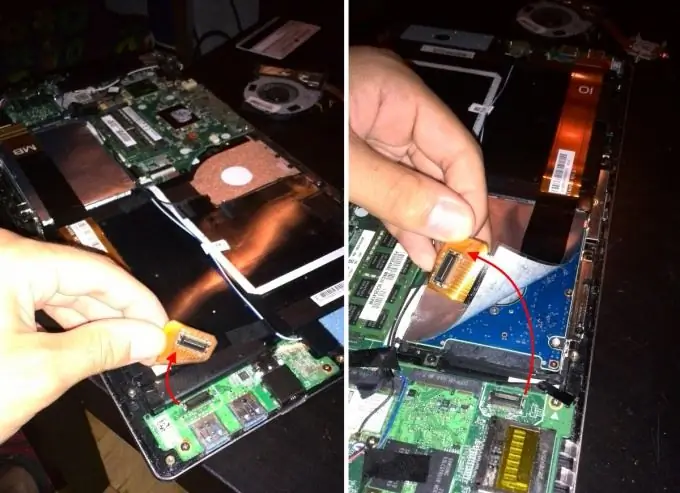
A large gold ribbon cable connects different parts of the motherboard and also prevents access to the hard drive and battery. To remove the ribbon cable, you need to release 2 connectors from both ends of the ribbon cable by gently pulling up on the protruding edges near the connectors.
Step 6
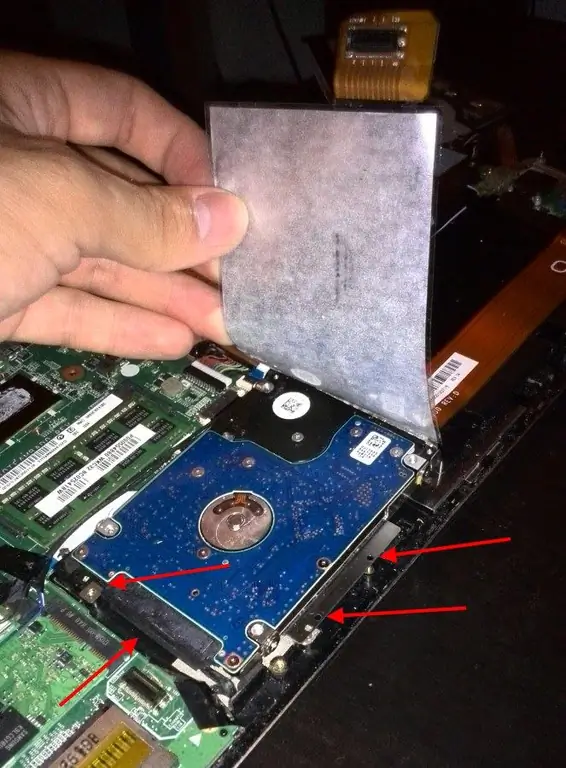
When the cable is removed, we will gain access to the hard drive. To remove the drive from the laptop, you need to unscrew the 3 retaining screws and disconnect the SATA connector.
Step 7
I think you can easily figure out how to remove the motherboard of a Toshiba Satellite U840W laptop, how to remove the battery, etc. Reassemble the laptop in the reverse order.


