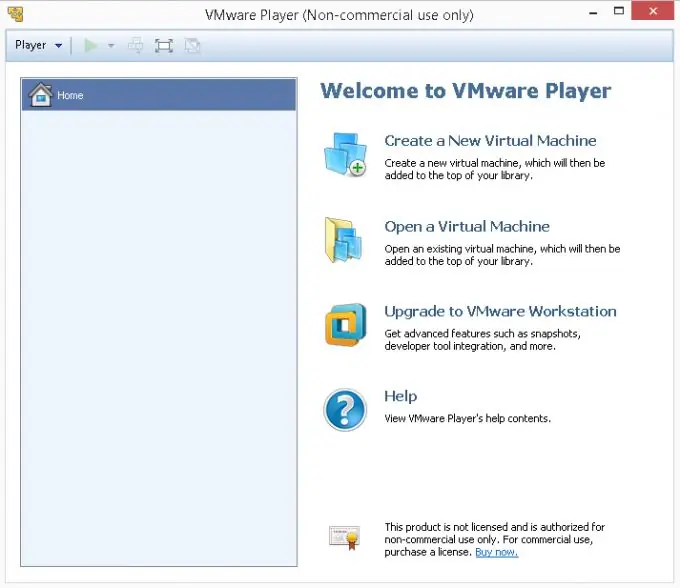
VMware Player allows you to run any operating system in an isolated environment without changing or harming your current operating system. For example, you can use it to view, test the Ubuntu operating system right in your running Windows. A good method to understand if a new operating system is right for you is before actually installing it on your computer's hard drive.
Necessary
- Computer with Windows operating system installed.
- Internet connection.
- The rights on the computer are sufficient to install the software.
Instructions
Step 1
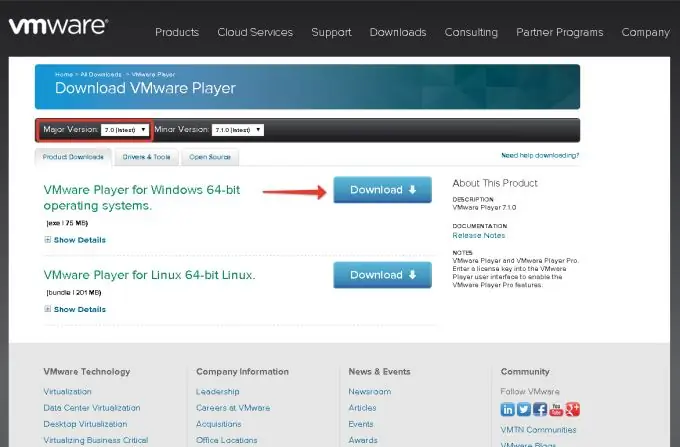
In order to install VMWare Player, you must first download it from the official VMWare website. To do this, go to https://www.vmware.com/go/downloadplayer and download the version suitable for your operating system. Please note: to download VMWare Player for 32-bit Windows, you must first select the 6th version of VMWare Player in the Major Version field. The last, at the time of this writing, version of the program is available only for the 64-bit version of the operating system.
Step 2
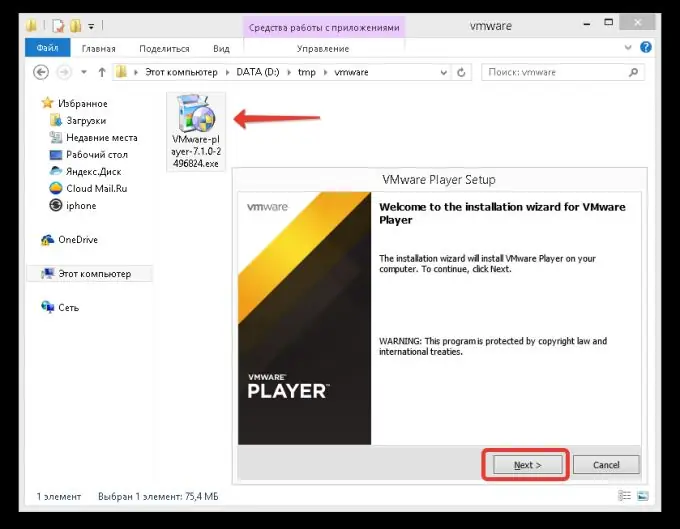
After the download is complete, run the installation file. The VMWare Player installation wizard will open. In the first step of this wizard, simply click the Next button.
Step 3
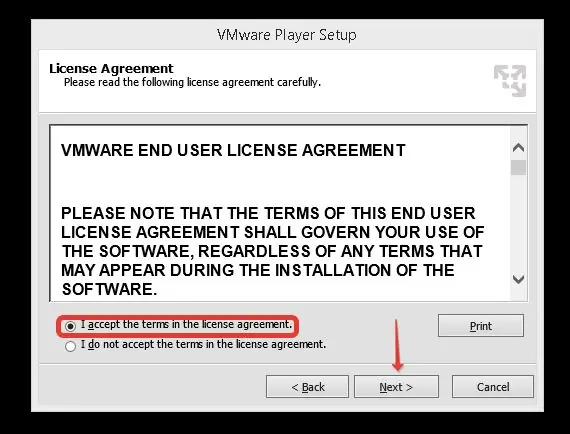
The next step, the installation wizard prompts you to accept the license agreement. We put a point in the I accept the terms in the license agreement field and click the Next button.
Step 4
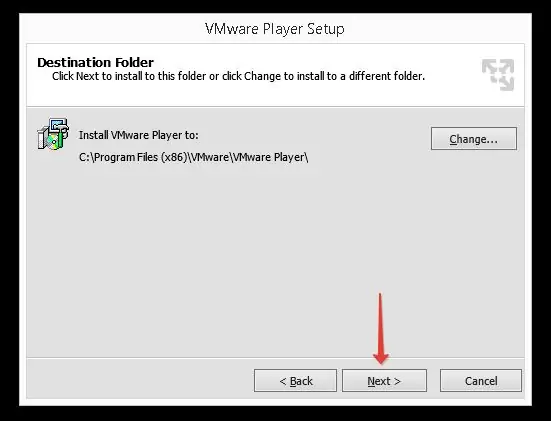
The next step, the installation wizard will prompt you to select a folder on the disk where the files of the VMWare Player program will be copied. You can leave the default or change if you have insufficient free space on the specified disk.
Step 5
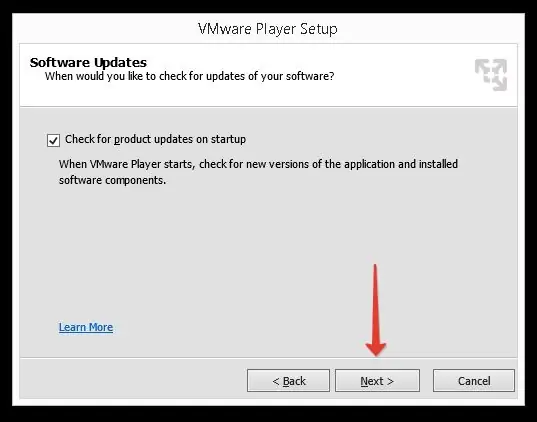
At the next step, the installation wizard will offer to check for updates for VMWare Player via the Internet. it is recommended to leave this option enabled to always have the latest software. Click Next.
Step 6
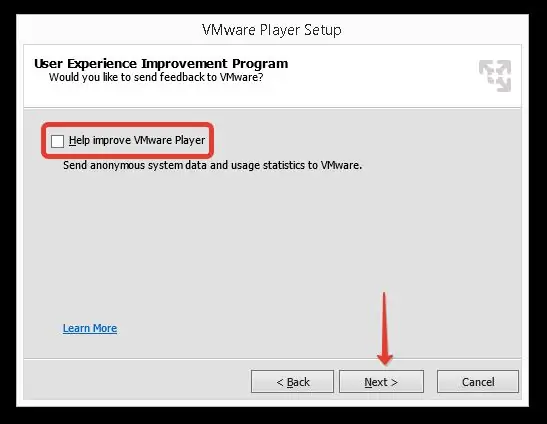
The next step is to determine if you want to help improve VMWare Player by sending anonymous statistics. It is recommended to disable this setting. Uncheck the box Help improve VMWare Player and click Next.
Step 7
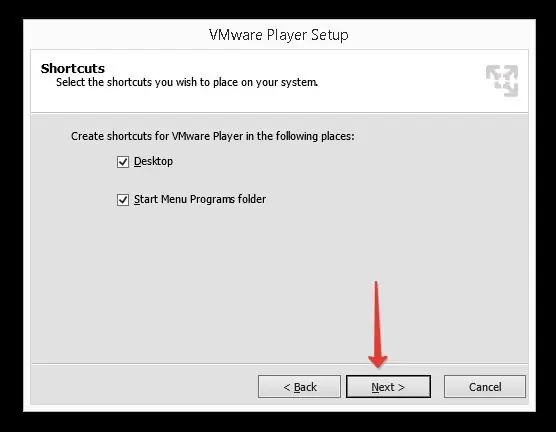
Next, you need to give the program permission to create shortcuts for launching VMWare Player. The installation wizard offers to create a shortcut in the main menu and on the desktop. You can opt out by unchecking the corresponding checkboxes, then clicking Next.
Step 8
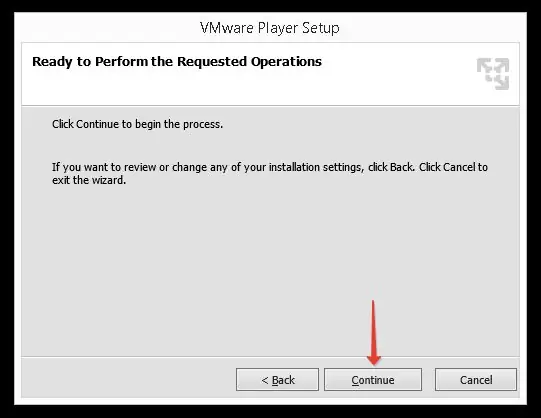
In the next step, the wizard will inform you that it is ready to install the program. Click the Continue button.
Step 9
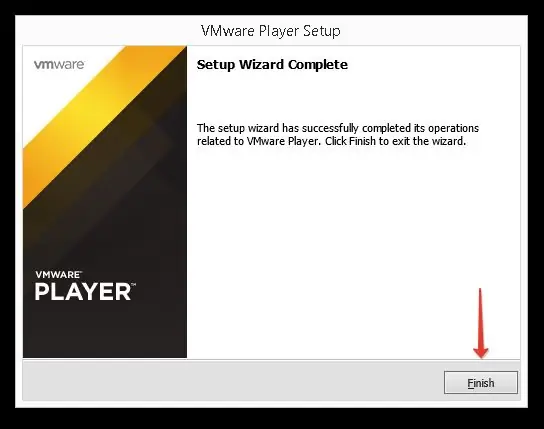
The program will be installed for some time. Upon completion of this process, the wizard will display the message: Setup Wizard Complete. Click the Finish button.
Step 10
This completes the installation process. You should have a shortcut to launch VMWare Player on your desktop. In the next article, we will look at the process of installing a guest operating system using the example of the Linux Xubuntu distribution.


