A clean, dry, soft, lint-free cloth is sufficient to physically clean the surface of the disc. It is advisable to wipe the surface with movements from the center to the edges, and not circular. But to clean the disc from the files recorded on it, you will need additional software. However, even with the appropriate program, not every CD or DVD can be cleaned.

Instructions
Step 1
Check to see if the disc's manufacturing technology is designed to overwrite the contents of the optical disc. This can be determined by its marking - the letter W must be present in the name (for example, DVD-RW, DVD + RW or CD-RW).
Step 2
Make sure that the optical disc drive installed in your computer is capable of writing to this type of disc. For example, a CD-only optical drive will not be able to erase a DVD. In addition, the name of the model must also contain the letter W, which means that it has not only playback functions, but also recording.
Step 3
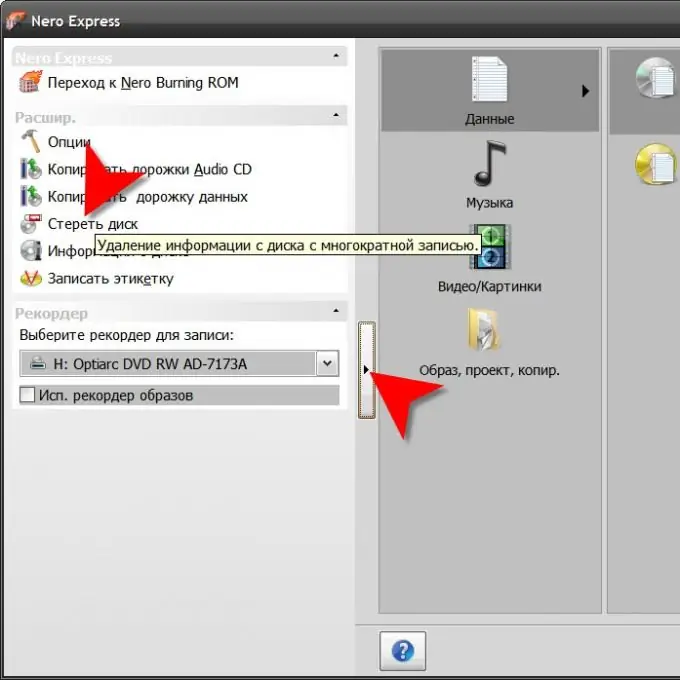
Place the disc in your optical drive and launch a CD / DVD burning software. For example, it might be the very common Nero Burning ROM program. When using Nero, the simplified interface - Nero Express - is sufficient to clean the disc. After launching this program, click on the vertical button at its left edge to open a panel with an additional set of utility functions. In the list on the additional panel, select the "Erase Disk" item.
Step 4
Change the program-defined optical disc device in the Select a recorder field, if necessary. If the purpose of cleaning is to free up space for a new recording, then leave in the drop-down list under the inscription "Select the erasing method used" the value "Quickly erase RW-disk". If you need to physically erase the files contained on the disk, then select "Erase the rewritable disk completely". Leave the default (Maximum) in the Erase Speed field.
Step 5
Click the "Erase" button and Nero will start the procedure, showing in a separate window a report on how it goes. If the content cannot be erased due to the fact that the disc was “finalized” in the previous session (the corresponding mark was set in the recording settings), then the program will display a message about this and interrupt the process.


