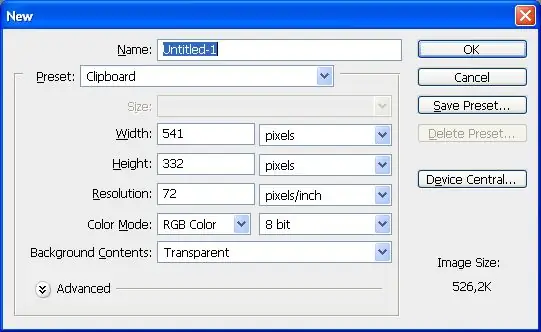
When using Photoshop, it is often necessary to create new documents. The quality of the created image and the convenience of working with it largely depend on the correct choice of the initial parameters.

Necessary
Computer, Photoshop
Instructions
Step 1
In the main menu of the program, select the command File → New ("File" → "New"). You can simply press the Ctrl + N keys on your keyboard. Photoshop will immediately open the New dialog box with the proposed default settings for a new document.
Step 2
If you are satisfied with all the automatically suggested parameters, click "OK". But, most likely, you will want to make changes to them "for yourself". Go back to the Prezent list and click on the checkmark to view it in full. Find the preset International paper size and select it.
Step 3
Click on the checkmark in the Size line to view the entire list of preset sizes. You will see familiar format names: A3 (newspaper sheet size), A4 (standard office sheet), A5 (148 mm x210 mm), A6 (small photo size 10x15 cm). Suppose that you like to shoot portraits, and you are going to print them in the format 20x30 cm after working in Photoshop. In this case, select A4 from the list of preset sizes. The width and height parameters (210 mm x 297 mm) and the image resolution will be automatically changed to 300 ppi (pixels per inch). This resolution is a guarantee of high-quality portrait printing. The usual Color mode parameters are RGB Color, 8 bit. Automatically, you will be presented with a White Background Contents (background), but if you need a transparent background, then white can be easily replaced by clicking on the checkbox and choosing Transparent.
Step 4
If you want to change the standard A4 format to other sizes, select "Custom" in the Prezent list and set the desired width and height of the image (Width and Height) in millimeters or pixels. After selecting the parameters you need, save them by clicking the Save Present button. In the New Document Present window that appears, click the "OK" button.
Step 5
The newly created preset document format will now always appear when you create it with the File → New command at the top of the Prezent drop-down list. If you want to delete it, select its preset format in the Prezent list and click on the Delete Prezent button, and then in the dialog box that appears, click on the Yes button.


