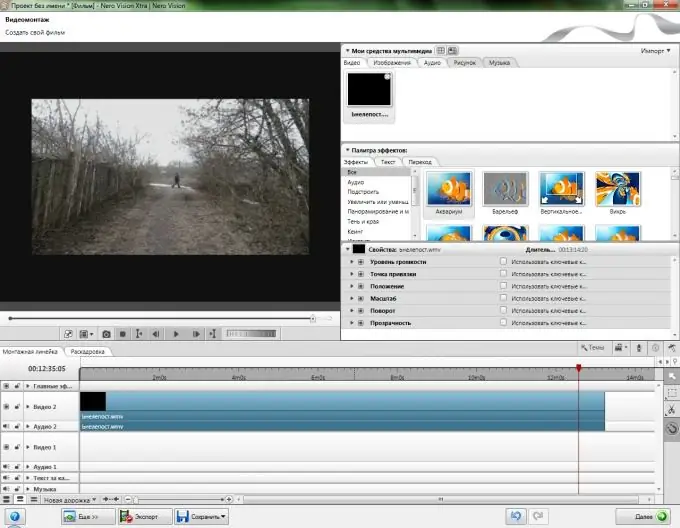
Many users appreciated the efforts of the developers of the Ahead Nero program to provide additional features. In addition to burning discs, the Nero Vision application is a full-fledged video editor with which you can, among other things, cut videos.

Instructions
Step 1
Start the Nero Vision application. In the program window, select the "Create Movie or Slide Show" item. Set the appropriate audio and video settings and confirm the continuation by clicking "OK". The editor workspace will open.
Step 2
In the upper right corner of the program, click on the "Import" button and select "Import file". In the dialog box that opens, find the video file you want to edit, click on it and click "Open". Also, you can simply drag it from the explorer window to the program window.
Step 3
Use the mouse to drag the file that appears in the "Video" tab to the pasteboard located at the bottom of the program workspace. From the toolbar on the right, select the Cutter, which is represented by the scissors icon. Clicking on a video track on the timeline with this tool will split it into two at the point you clicked. Working with the "Cutter" in this way, divide the video into the required number of parts and cut off all unnecessary parts.
Step 4
To remove excess parts of the trimmed video, select Standard Tool from the toolbar. It is depicted with an arrow icon. Right-click on the unwanted part of the video and select "Delete" in the list of actions that appears. Remove all unnecessary parts in the same way.
Step 5
After that, connect the remaining parts and save the result. Click on the "Export" button at the bottom of the program window and in the next window select "Export video to file". Set one of the proposed formats, audio and video compression settings, and the location of the future file. Then click the "Export" button, which is located in the lower right corner of the window. Wait until the end of saving the video file. This process will take different time depending on the length of the video and the selected compression settings.


