The rich image processing capabilities of Adobe Photoshop allow you to give your photo a finished look by placing it in a frame. You can create a frame in different ways, choosing the color, size and texture of your choice.

Instructions
Step 1
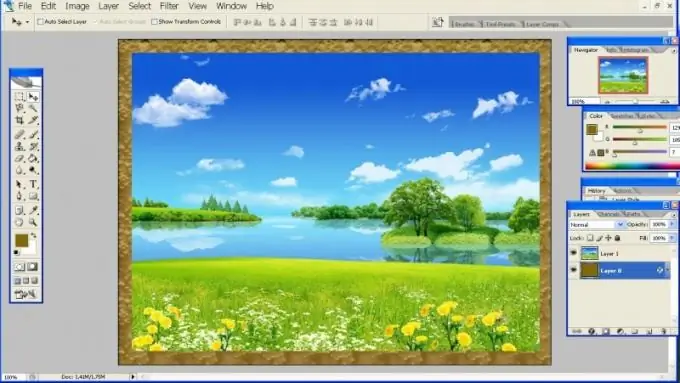
Open your image. On the Image menu, using the Image Size command, look at its dimensions. From the File menu, select New and enter the dimensions of the new file larger than the main image by the width of the frame. Fill the new picture with a suitable color using the Paint Bucket Tool.
Step 2
Open the main image again, press Ctrl + A to select it, and Ctrl + C to copy to the clipboard. Open the file with the frame and paste the main picture Ctrl + V.
Step 3
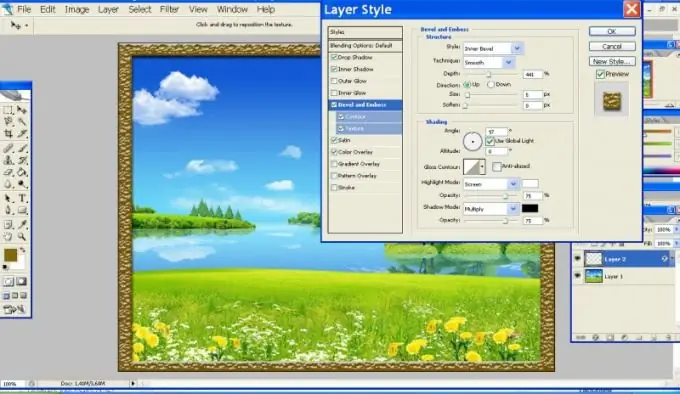
Go to the layer with the frame and double click on the icon. In the Layer Style window open Bevel and Emboss and select a suitable texture for the fill. Adjust the Deps, Size and Soften parameters so that the frame looks three-dimensional. Add inner and outer shadows (Inner Shadow and Drop Shadow). From the Satin menu choose a color that is darker than the border color and set the blending mode to Multiplay.
Step 4
You can do it differently. Open the main image and press Ctrl + A. From the Selection menu, choose the Transform Selection command. Hold down the Shift key and resize the selection so that the indent from the edges of the picture is equal to the width of the frame.
Step 5
In the same Selection menu, select the Inverse command or use the Ctrl + Shift + I keys. Copy the selection to a new layer with Ctrl + J. Fill the frame with a suitable color or texture using the Paint Bucket Tool. Using the Layer Style window, add shadow, volume, gloss, etc. to the new layer.

Step 6
You can make a selection in the form of a frame using the Rectangle Tool or the Rounded Rectangle Tool. In the second case, you will get a frame with rounded edges. Press the U key and check the selection view and the Path tool in the Options bar. Draw a rectangle, offset from the edges of the image by the width of the frame.
Step 7
Right click on the border of the rectangle and choose Make Selection. Invert the selection with Ctrl + Shift + I, copy to a new layer and proceed as described above.


