Usually, when inserting an image into a text document or into a hypertext format document, the text around the picture "disperses" - one line leaves the lower right edge, and the rest of the space remains empty to the height of the picture. This is due to the fact that the centering parameter is not specified for the image. It is easy to change the situation in both the text editor and the html-code editor.

Instructions
Step 1
Start Microsoft Word and load the necessary text into it if you need to adjust the position of the picture in a document of this format. If the image has not yet been inserted into the text, then place the insertion cursor in the desired position and go to the "Insert" tab of the text editor menu. In the group of commands "Illustrations" there is an icon "Picture" - click on it, then in the window that opens, find the desired image and click the "Insert" button.
Step 2
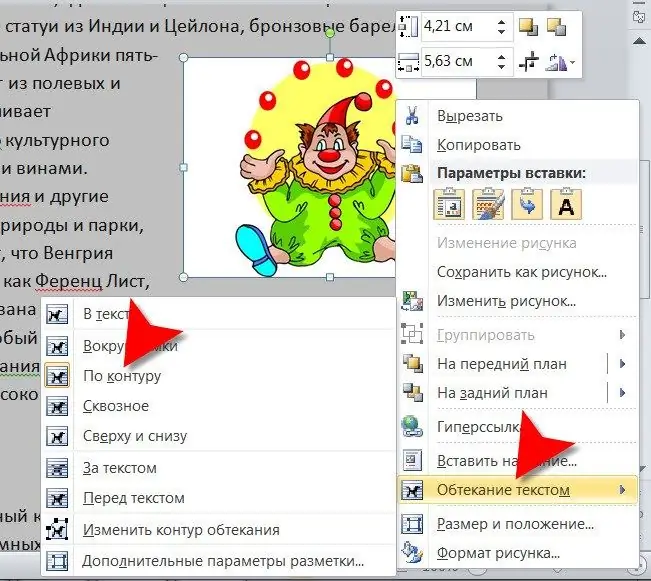
Click the picture in the text of the document with the right mouse button and in the context menu open the section "Text wrapping" (this can be done by pressing the "M" key). Some of the centering options included in this section allow you to put the picture in the position you need. By hovering your cursor over each menu line, you will see exactly how the position of the image in the text will change if you select this item. Click, for example, the line "Along the contour".
Step 3
Drag the picture to the left or right edge of the page with the mouse and the operation will be completed. Save your document.
Step 4
If you need to insert an image into an html document, then you can set the text to wrap around it, for example, using the align attribute of the img tag. With a set of attributes that is minimally sufficient for normal displaying of a picture, this tag can be written as follows:
Here, the single src attribute specifies the name of the file containing the desired image (image.png). To set the text to wrap around the image on the right, add the align attribute with the left value:
If you want the text to flow around the image on the left, then replace the value left with right.
Step 5
If you have the opportunity to use the editor of html-pages in which the visual mode is provided, then you do not need to edit the code yourself and add the necessary attributes to the tags. In this case, you can click the picture, and then click the insert image button on the panel with the editor's control buttons. In the window that opens, there should be a drop-down list with options for centering the image - select the line you need (left or right), and then save the edited page.


