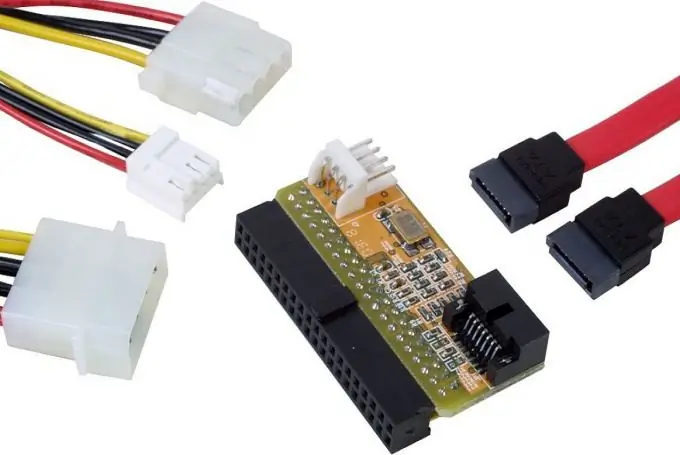
IDE is an outdated connector for connecting hard drives and CD / DVD drives. In modern motherboards, it is less and less common. Therefore, the owners of such devices may have problems connecting more modern components to them. Most often, these problems are solved using converter adapters.

Instructions
Step 1
Buy a SATA-IDE adapter.
Step 2
Disconnect power and all connection cables from your computer. Open the cover of the system unit. Touch the radiator for a few seconds. This is to discharge static electricity from your hands, otherwise it can damage sensitive computer components.
Step 3
Take a SATA cable - you will need it to connect your adapter to the motherboard. A SATA cable is usually about 25 centimeters long, most often red in color. You can easily recognize it by the connector: about a centimeter wide, flat, with a slight bend at one edge. Both sides of the SATA cable are equal, so it doesn't matter which side you plug it into the motherboard and which side you plug it into the adapter.
Step 4
You will also need an IDE ribbon cable to connect your floppy drive or hard drive to the converter. The IDE cable is flat, about 5 centimeters wide, with rigid plastic connectors in the form of two rows of holes. Usually has three connectors, one distant from the other two. This connector is used to connect to the motherboard or controller.
Step 5
Find any free SATA connector on the motherboard. They correspond in shape to a SATA cable, only they are surrounded by a protective frame that will help to connect the cable correctly. Plug one end of the cable into the motherboard and the other into your adapter.
Step 6
Connect the IDE cable between your device (floppy drive or hard drive) and the SATA-IDE adapter. Insert the far single end of the cable into the adapter, and one of the free connectors on the other side into the floppy drive.
Step 7
Please note: near the place for the cable on your drive there is a group of six pins, which can be connected with a small plastic jumper - a jumper. On the top or bottom of the drive, near these pins, you will find the MA / SL / CS markings. If you don't have a jumper, you don't need to do anything. If there is a jumper, pull it out and place it opposite the CS mark. This is necessary to correctly identify your device.
Step 8
Connect the white rectangular connector from the power supply to your floppy drive. If the adapter has a white rectangular four-prong socket, connect another connector from the power supply to it. Insert the floppy drive or hard drive into the case of your system unit if you took it out.
Step 9
Plug in the power cord, keyboard, mouse, and monitor cables. Turn on your computer - your adapter is ready to go.


