It's easy to create a 3D floor plan from scratch in 6 simple steps. This technique can be used in infographics such as an evacuation plan or to showcase a building layout.
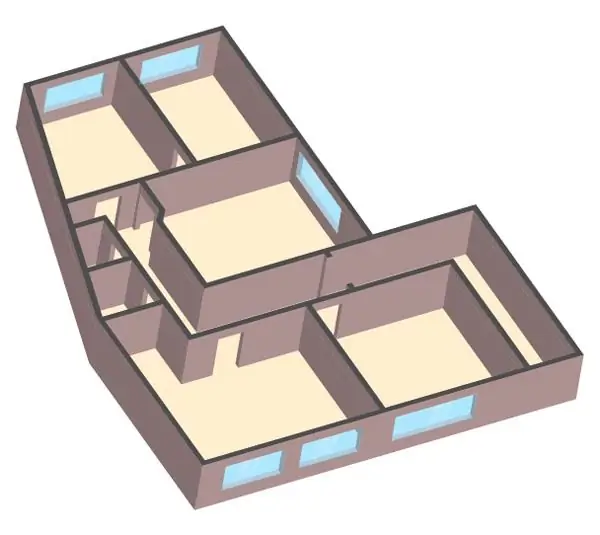
Necessary
- Program: Adobe Illustrator version CS3 / 4 or higher
- Proficiency level: Beginner
- Time to complete: 30-45 minutes
Instructions
Step 1
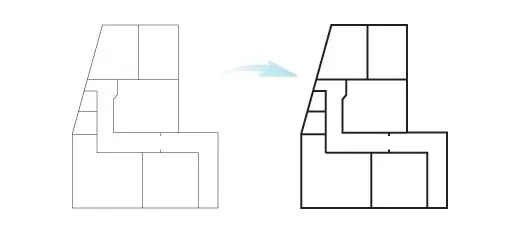
Draw a plan of the room you want to create using the Pen Tool or the Line Segment Tool (hold Shift to draw lines at right angles).
Don't worry about doors or windows at this stage, we're just creating a basic layout.
When the drawing looks like it should, adjust the line thickness according to the scale at which you are working.
Step 2
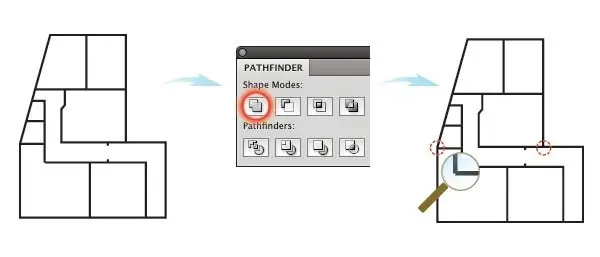
Select all the lines and hit Object> Expand to expand the lines. Without removing the selection, use the Unite function on the Pathfinder toolbar to combine the lines into one path (just in case, you can save a copy of the original drawing).
You may notice that some of the lines are not perfect as shown below. Use the Pen Tool to make adjustments.
Step 3
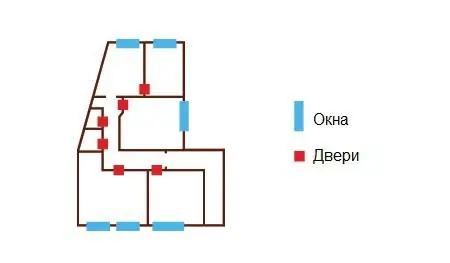
Place simple rectangular shapes where doors and windows should be. I used two different colors to avoid confusion - blue for the windows and red for the doors.
Step 4
Select everything together and make three copies. Using the Divide function on the Pathfinder toolbar, cut out the doors and windows on the first copy. Cut out only the doors on the second copy and leave the third copy without doors and windows.
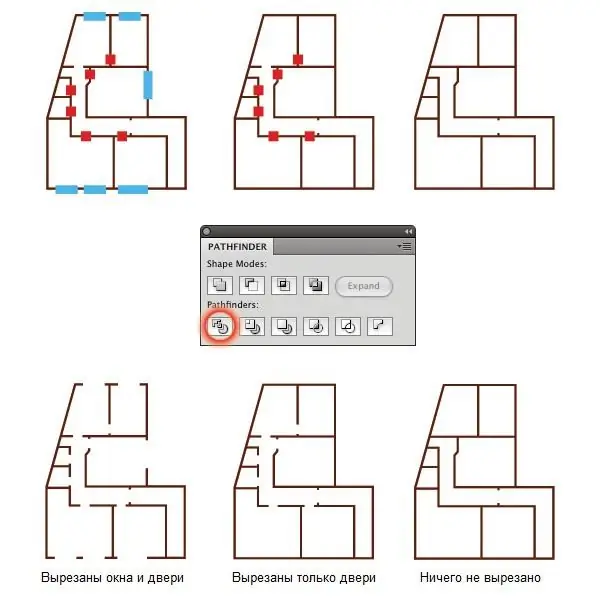
Step 5
Select the first copy and hit Effect> 3D> Extrude and Bevel, use the preview function to achieve the desired result (I used angles -40 °, -25 ° and 16 °). Set the Extrude Depth to 15pt. Remember these parameters and apply them to copies 2 and 3, changing only the Extrude Depth value. Set the second copy to a value between 20 and 23pt, and the third copy to 15pt.
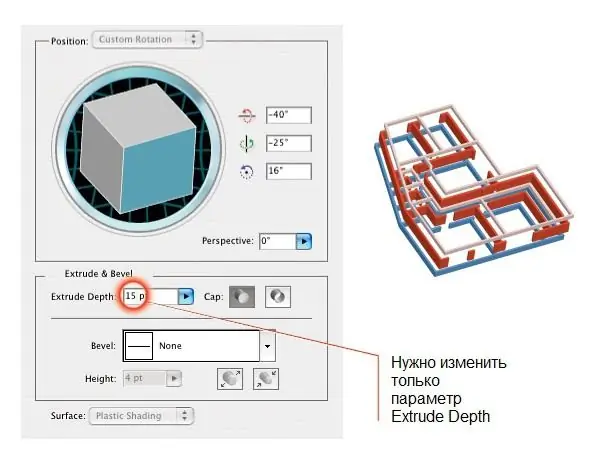
Step 6
Superimpose copies on top of each other. Change the color of all copies to your desired color (I used # fddfd9). As a result, it should look like the picture below.
The basic structure is ready, but it looks pretty boring. This can be fixed by selecting the entire building and then going to Object> Expand Appearance. Now you can position the floor and windows. You can also paint over the top of the wall in a darker color.


