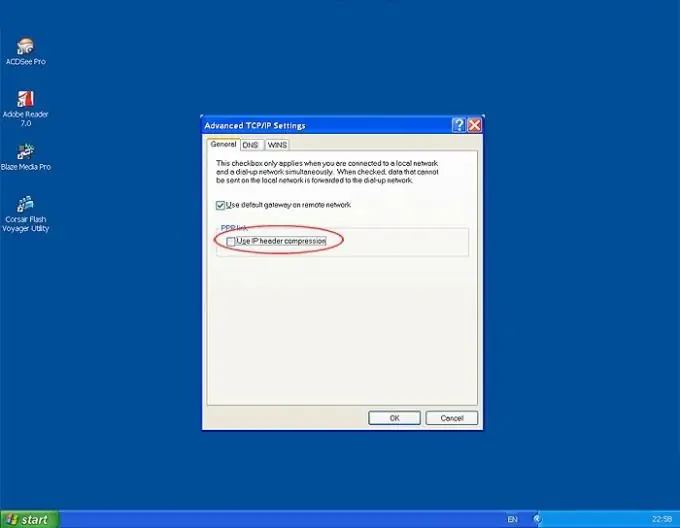
For dial-up connections, that is, those that are established at the user's request, it is possible to fine-tune the data compression methods. It is about enabling or disabling the compression of the headers of IP data packets. As a result of compression, the speed of information exchange increases. This method is applicable only for connections on demand, that is, for a permanent connection to the Internet through a local network or router, compression of IP headers is not applicable.

Instructions
Step 1
Click the "Start" button and select the "Control Panel" menu. Select the category "Network and Internet" and activate it with the left click. A subsection will open in which you will find "Network and Sharing Center". The View Network Status and Tasks menu is what you need to open. This method works in Vista and Windows 7. The features of WinXP will be discussed below. If your control panel uses a view not by category, but by "small icons", immediately click on the icon "Network Control Center …". This procedure can be performed by a user with any privilege level, except for “Guest” access.
Step 2
In the lower half of the window, click the inscription "Connect to the network." A pop-up window will appear on the right with a list of your network connections. If the connection is currently in use, it must be disconnected first. Right click on the name of the connection you want to change. Select Properties. Activate the "Network" tab. Select the inscription "Internet Protocol Version 4 (TCP / IPv4)" in the upper part of the window, then click on the "Properties" button. The window for configuring the network protocol will open. Click the Advanced button at the bottom of the window. A window titled "Advanced TCP / IP Settings" appears. At the very bottom of the window, on the first tab (IP Settings), under the heading "PPP Communication", check the box next to the line "Use IP header compression". Click "OK" in each of the windows to save your changes.
Step 3
Configuring IP header compression for Windows XP is not much different from the one described above. Click the Start button, then open the Control Panel menu. Find the "Network Connections" menu and open it. Then do the same operations as described in paragraph 2. All actions and names remain in effect. Please note that this procedure is not possible when connected via Wi-Fi wireless technology.


