The grid can be very helpful when creating and editing objects. For example, if the dimensions of future objects are multiples of 5 pixels, then you can specify a grid cell size of 5 pixels and turn on snapping to the grid.

The grid is displayed only when working in Adobe Illustrator and is not displayed when printed on paper.
To show or hide the grid, select View> Show Grid or View> Hide Grid (or use the [Ctrl + "] key combination).
To enable snapping of objects to the grid, select View> Snap to Grid from the menu (keyboard shortcut [Shift + Ctrl +”]). In this case, objects already placed on the artboard will not snap to the grid automatically; for this, you will need to select the object and move it. All new objects will automatically snap to the grid.
If you have selected the view in pixels (View> Pixel Preview), then the snap to grid will change to snap to pixels.
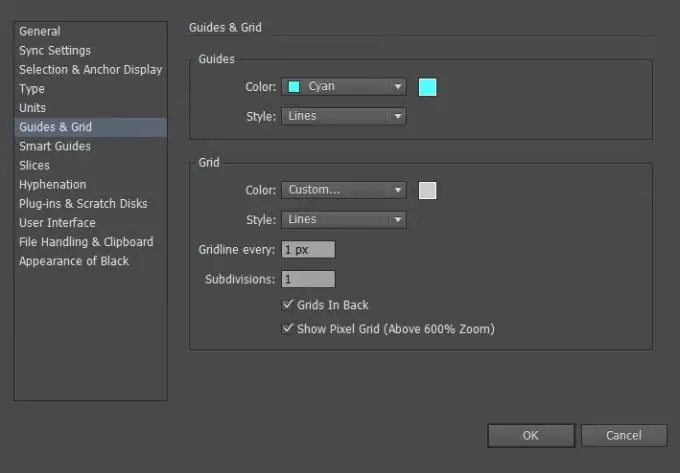
To adjust the grid options, you need to go to Edit> Preferences> Guides & Grid (under Windows) or Illustrator> Preferences> Guides & Grid (under Mac OS).
Let's consider the possible settings for the grid:
- Color - is responsible for the color of the grid lines;
- Style - the style of the grid lines (solid or dashed);
- Gridline every - the spacing between the lines;
- Subdivisions - dividing a grid cell into several parts;
- Grids In Black - hide or show the grid over black objects;
- Show Pixel Grid - show or hide the pixel grid when the artboard is zoomed in large (over 600%).


