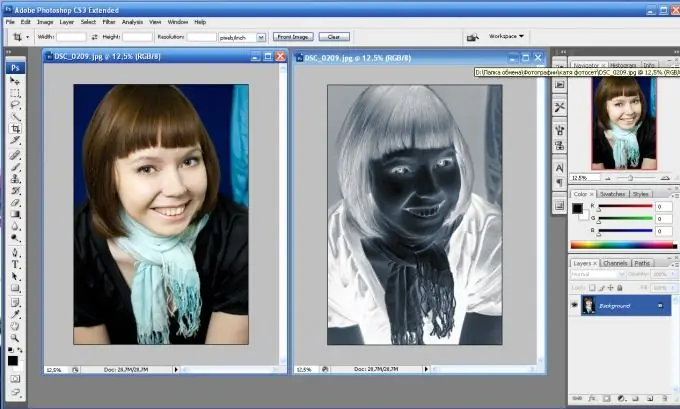
Every amateur photographer and, moreover, a professional is familiar with such a concept as negative. The word, derived from the Latin negativus, denotes the opposite, negative meaning of color: the lighter parts on the film turn out to be dark, and vice versa. The brightness of the color also changes in the opposite direction, and the paler areas of the image are ultimately the brightest. Printing from negatives makes it possible to get clearer pictures, to correct some areas of skin or clothing in the direction of their improvement. How to make a negative out of a photo? The program Adobe Photoshop will come to the rescue.

Instructions
Step 1
Open the image to be converted to negative.
Step 2
The next step is to invert the color. Inversion is a change of colors to the opposite, reverse. The key combination Ctrl + I will help to do this, or you can perform the operation through the menu: "Image - Correction - Inversion" (Image - Adjustments - Invert). You will see that the color of the original image has changed.
Step 3
Many stop at the second step, but this is wrong, since the negative is not completely created. After inverting, be sure to desaturate your image. This can be done both from the keyboard - Shift + Ctrl + U, and through the menu: "Image - Correction - Desaturate" (Image - Adjustments - Desaturate). As you can see, the image is completely black and white.
Step 4
Next, you need to correct the photo. The menu item "Image - Correction - Hue and Saturation" (Image - Adjustments - Hue / Saturation) will come to the rescue. Here, be sure to check the box next to the "Colorize" option. Next, use the cursor to change the field values from top to bottom: hue - 209, saturation - 15, lightness remains the same, zero. Click OK.
Step 5
The next step is to work on the ratio of light and shadow: "Image - Correction - Highlights / Shadows (Image - Adjustments - Shadows / Highlights). A new window for image correction will open. If it's small, click on Show More Options at the bottom. Change the tone and light values to make the image richer and better. In the item "Shadows" - Shadows set the following values: quantity - 0, width of the tonal range - 50, radius - 30 pixels. In the "Lights" menu: effect - 35, width of the tonal range of light - 75, radius - 30. The values of color correction and contrast of midtones should be minus: color correction should be set at level - 8, contrast of midtones --10.
Step 6
Often when creating negatives, the image is inverted. This can be done using the menu item "Image - Rotate and Flip" (Image - Rotate Canvas). Your negativity is ready.


