Digital video has become an integral part of our lives. In the modern world, most of the video material, one way or another, is preserved and distributed in digital form and on digital media. The availability of consumer video recording equipment is driving the rapid growth of amateur video in private video collections. Therefore, most people who use a computer in everyday life, sooner or later begin to think about how to change a video by adding various effects to it, changing its resolution or compression ratio. All of this can be done using the free video processing software VirtualDub.
Necessary
VirtualDub video processing software available for download at
Instructions
Step 1
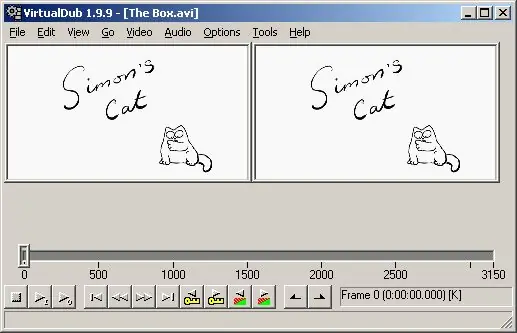
Open the video file in VirtualDub software. To do this, select the "File" and "Open video file…" items in the main menu of the application. You can also press the key combination Ctrl + O. In the opened file dialog that appears, select the file you want to edit and click the "Open" button. For the convenience of viewing frames of the original and processed video, you can change the size of the corresponding windows by selecting the display scale in the context menu.
Step 2
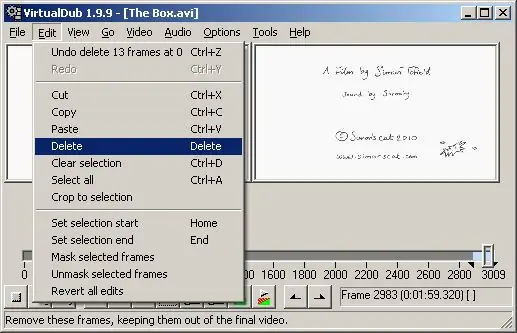
Edit your video. Use the commands on the Edit menu to make changes. You can cut, copy, paste and delete video fragments using the Cut, Copy, Paste and Delete commands, respectively. The commands "Set selection start" and "Set selection end" are used to set the beginning and end of the selection of a video fragment. With the "Select all" command, you can select all videos from start to finish. Moving through the video clip can be done using the slider or the buttons on the control panel.
Step 3
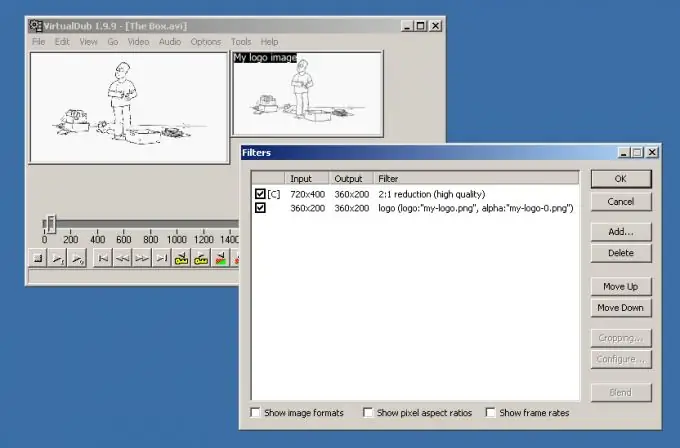
Add effects to the edited video using filters. Select the "Video" and "Filters …" items from the menu, or press the key combination Ctrl + F. In the "Filters" dialog that appears, add and configure the required filters.
Step 4
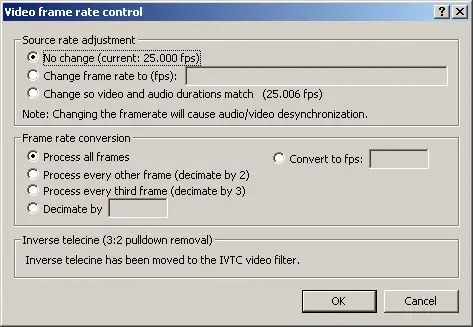
Set the frame rate of the resulting video. Select the items "Video" and "Frame Rate …" from the menu, or press the key combination Ctrl + R. Set the required parameters in the "Video frame rate control" dialog that appears.
Step 5
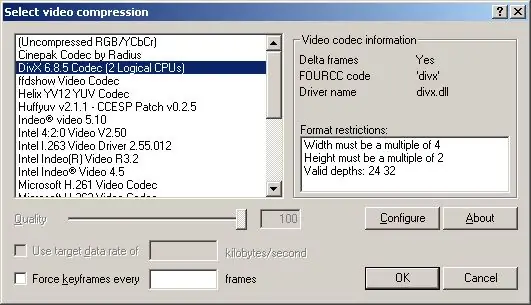
Select the encoder to compress the video stream. Open the "Select video compression" dialog by pressing the Ctrl + P keys, or by selecting the "Video", "Compression …" menu items. In the dialog, set the selection to the desired encoder. If necessary, configure the selected encoder by clicking the "Configure" button.
Step 6
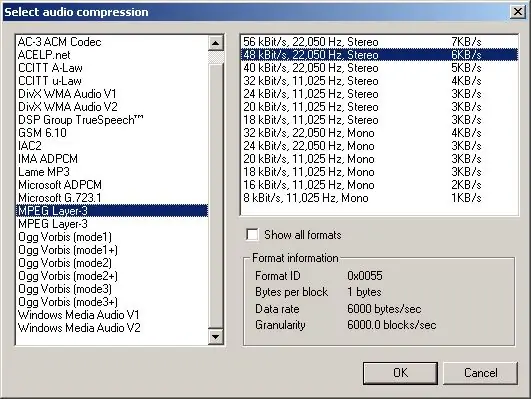
Configure the encoder to compress the audio stream. Select "Audio" and "Full processing mode" from the menu, then "Audio" and "Compression". In the "Select audio compression" dialog select the desired encoder and then the appropriate audio stream format.
Step 7
Save the edited video to a file. To do this, select the "File" and "Save as AVI …" items in the menu, or simply press the F7 key. In the dialog that appears, specify the name and path to save the file. Then click the "Save" button. The process of saving the file will begin. It can be quite lengthy because the video is being processed during the saving process. The current processing statistics will be displayed in the "VirtualDub Status" dialog. At the end of the saving process, this dialog will close automatically.


