There are good and bad films. If bad films are deleted immediately after watching, then you want to leave the good ones, so that later, perhaps, you can watch them again. As a rule, for this they are recorded on discs. But what if the movie is long and literally a few megabytes won't fit on disk? For example, you can crop his titles.

Necessary
VirtualDub
Instructions
Step 1
In order to cut titles from a video, you need any video editor, for example, the small and free VirtualDub. You can download it from the official website of the developer https://virtualdub.sourceforge.net/. Save the archive to disk and unpack it to a place convenient for you. There is no need to install the editor, it is ready to use
Step 2
Run VirtualDub.exe. You will be presented with the GNU GENERAL PUBLIC LICENSE, click OK and then click on the Start VirtualDub button. Open your video file from the top menu File - Open video file or press Ctrl + O and wait for VirtualDub to download and process the file.
Step 3
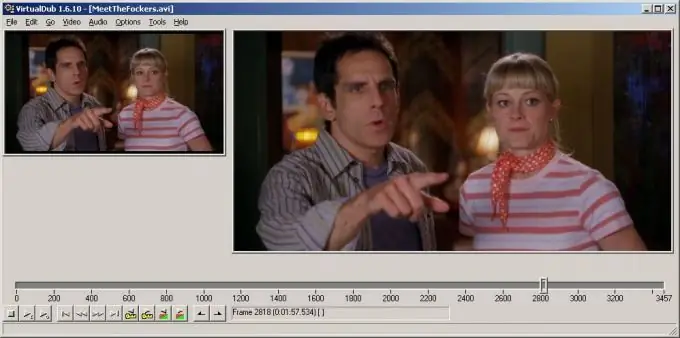
The editor interface is simple and intuitive. The left window shows the original quality of the video, in the right - the quality obtained after processing. At the bottom there is a rewind bar and standard player buttons. In addition, there are buttons for moving by key frames, scanning to the next scene and buttons for setting the beginning and end of the selected scene.
Step 4
On the rewind strip, place the slider where the beginning of the cut roller will be. Then select Edit - Set selection start in the top menu or press the Home key. Now move the slider to where the video will end and select Edit - Set selection end or press the End key. The selected area turns blue.
Step 5
Now it remains to select the compression of the selected area. If you want to leave the video and sound in the same state as they were, then in the top menu Video and Audio select the Direct stream copy line.
Step 6
All that remains is to save the new file. To do this, in the top menu, click File - Save as AVI. Enter a new filename and click the Save button. Wait for the editor to copy the cut area to disk. To check, run the resulting file. If you did everything according to the instructions, then there should be no desynchronization of video and sound.


