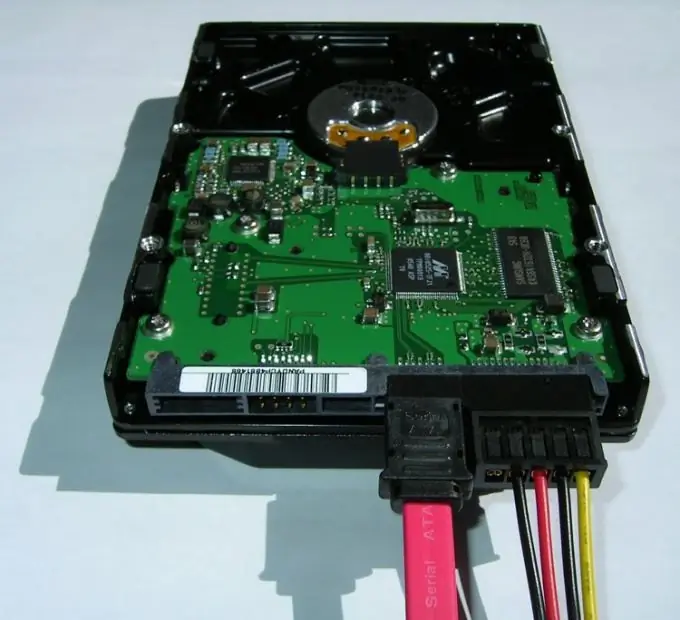
SATA (Serial Advanced Technology Attachment) is an abbreviation for a data exchange interface used to read and write information to computer hard drives. The fundamental difference between this standard and the previously used IDE (Integrated Drive Electronics) interface is parallel, not serial, data transfer. From the point of view of the technology of installing two hard drives using a SATA interface, the procedure has been significantly simplified compared to hard drives on the IDE bus.

Necessary
Two SATA signal cables and eight machine screws
Instructions
Step 1
Prepare the connecting cables and mounting materials - without two SATA cables and at least six screws, there is no point in starting the hard drive installation procedure.
Step 2
Shut down the OS and disconnect the system unit from the network - unplug the power cord or turn off the switch on the back of the system unit. In this case, the first option is preferable, as a more radical one.
Step 3
Remove both side panels from the system unit - you will need access from both sides to secure the installed hard drives with screws. The side panels are usually attached with two screws to the rear of the chassis, and are detached from the chassis by sliding back about five centimeters.
Step 4
Find the slots for connecting SATA cables on the motherboard and select two bays for the installed hard drives on the chassis of the system unit. In this case, proceed from the length of the connecting cables - the distance from the selected compartment to the slots on the motherboard should not be too great.
Step 5
Install both hard drives in the selected bays with the connectors facing the motherboard. Secure the hard drives on both sides with screws.
Step 6
Connect each of the hard drives with a SATA cable to free SATA slots on the motherboard. It will not be difficult to insert the plug correctly - it is unbalanced, and it is almost impossible to do it wrong. Unlike IDE interfaces, it does not matter here which of the hard drives you connect to which port, just as there is no need to set jumpers on hard drives accordingly.
Step 7
Connect the free power bus connectors to the corresponding inputs on each hard drive.
Step 8
Connect the network cable and turn on the computer - as a rule, when connecting two SATA hard drives, no additional settings in the BIOS are required. If you see both new hard disks in the standard file manager of the computer's operating system, then the installation went well and you can replace the side panels of the system unit.


