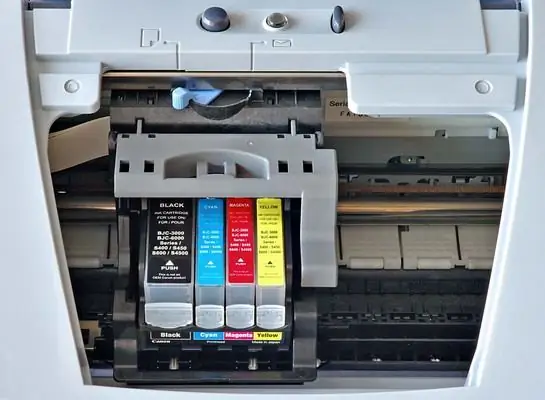
In inkjet printers, the print head becomes clogged with prolonged use. In this case, the print quality may deteriorate: the ink starts to wash out, streaks may appear. Then it becomes necessary to rinse and clean the print head. It must of course be removed from the printer before cleaning.

Necessary
- - Computer;
- - Canon printer.
Instructions
Step 1
There are a lot of printer models, but below we will consider the process of removing the print head using the example of Canon printers. Since it is the printers of this company that are the most popular. The printer does not need to be connected to the computer for the following steps. So you can put it wherever you like. But an electrical connection is required.
Step 2
Connect the printer to an electrical outlet, and then turn on the power to the printer. Wait about ten seconds. Open the printer cover, the print head carriage will start to move and stop after a few seconds. Examine the printhead carefully. There is a lever below it. It is he who fixes the print head. Take this locking lever and slide it up slightly. When it is up, you can remove the printhead. If you do not plan to connect the head to the printer in the next few hours, close the cover and turn off the power.
Step 3
If you need to remove a cartridge from the printhead, simply pull it lightly towards you. To reinstall the cartridge, simply insert it into the slot and push gently forward until you hear a click. This click will mean that the cartridge is fixed in the print head.
Step 4
To install the printhead back into the printer, turn it on. Open the printer cover and wait until the carriage stops. Place the printhead in the slot it was removed from. After that, simply lower the locking lever to the lower position. Close the printer cover.
Step 5
When you print for the first time after installing the head, a dialog box appears asking if one of the ink tanks has been replaced, if you did not replace the cartridge, click "No". This will help the printer software to correctly determine the level of ink remaining in the cartridges.


